


Autumn Color Energy with Ice Dyeing
a super easy natural dye technique
This newsletter has English and Spanish versions. To choose which language you receive, visit your settings on Substack, find this newsletter under Subscriptions, and select the language(s) you want.
Leer en español aquí.
Although natural dyeing has been part of my creative practice and my life for several years now, I still sometimes fall into a rut. Especially if I put all my dye pots and materials neatly away, it can be hard to overcome inertia and start a potentially messy project. This is a constant battle for me with apartment living… I want my small space to be neat and tidy but I also want to have lots of creative works in progress and those two goals are forever at odds.
Summer was a creative slump for me this year. I used to think of summer as my high-energy season in Chile- days in Viña del Mar don’t get too hot, and long hours of sunlight means more time to be up and about doing things. But I’ve also become more sensitive to the sun and the way it beats down through my living room window (which is also my workspace for everything that doesn’t require water or heat) during these long afternoons makes it hard to do anything at all.
Fall, however, has become a season of renewed energy. Plenty of days that aren’t so cold that I just want to stay under the blankets, but the sun isn’t so intense that I start feeling ill. So even though my day job workload picks up in the fall, once the afternoon sun gets a little less intense I start looking for ways to fit natural dyeing into my life again.
This year, I wanted something easy, that wouldn’t take up too much space or create a big mess, but that would still feel new and creative and allow me to play with lots of different colors. I’ve wanted to try ice dyeing ever since watching this Feedback Friday session with Cara Marie Piazza and it was exactly what I was looking for.
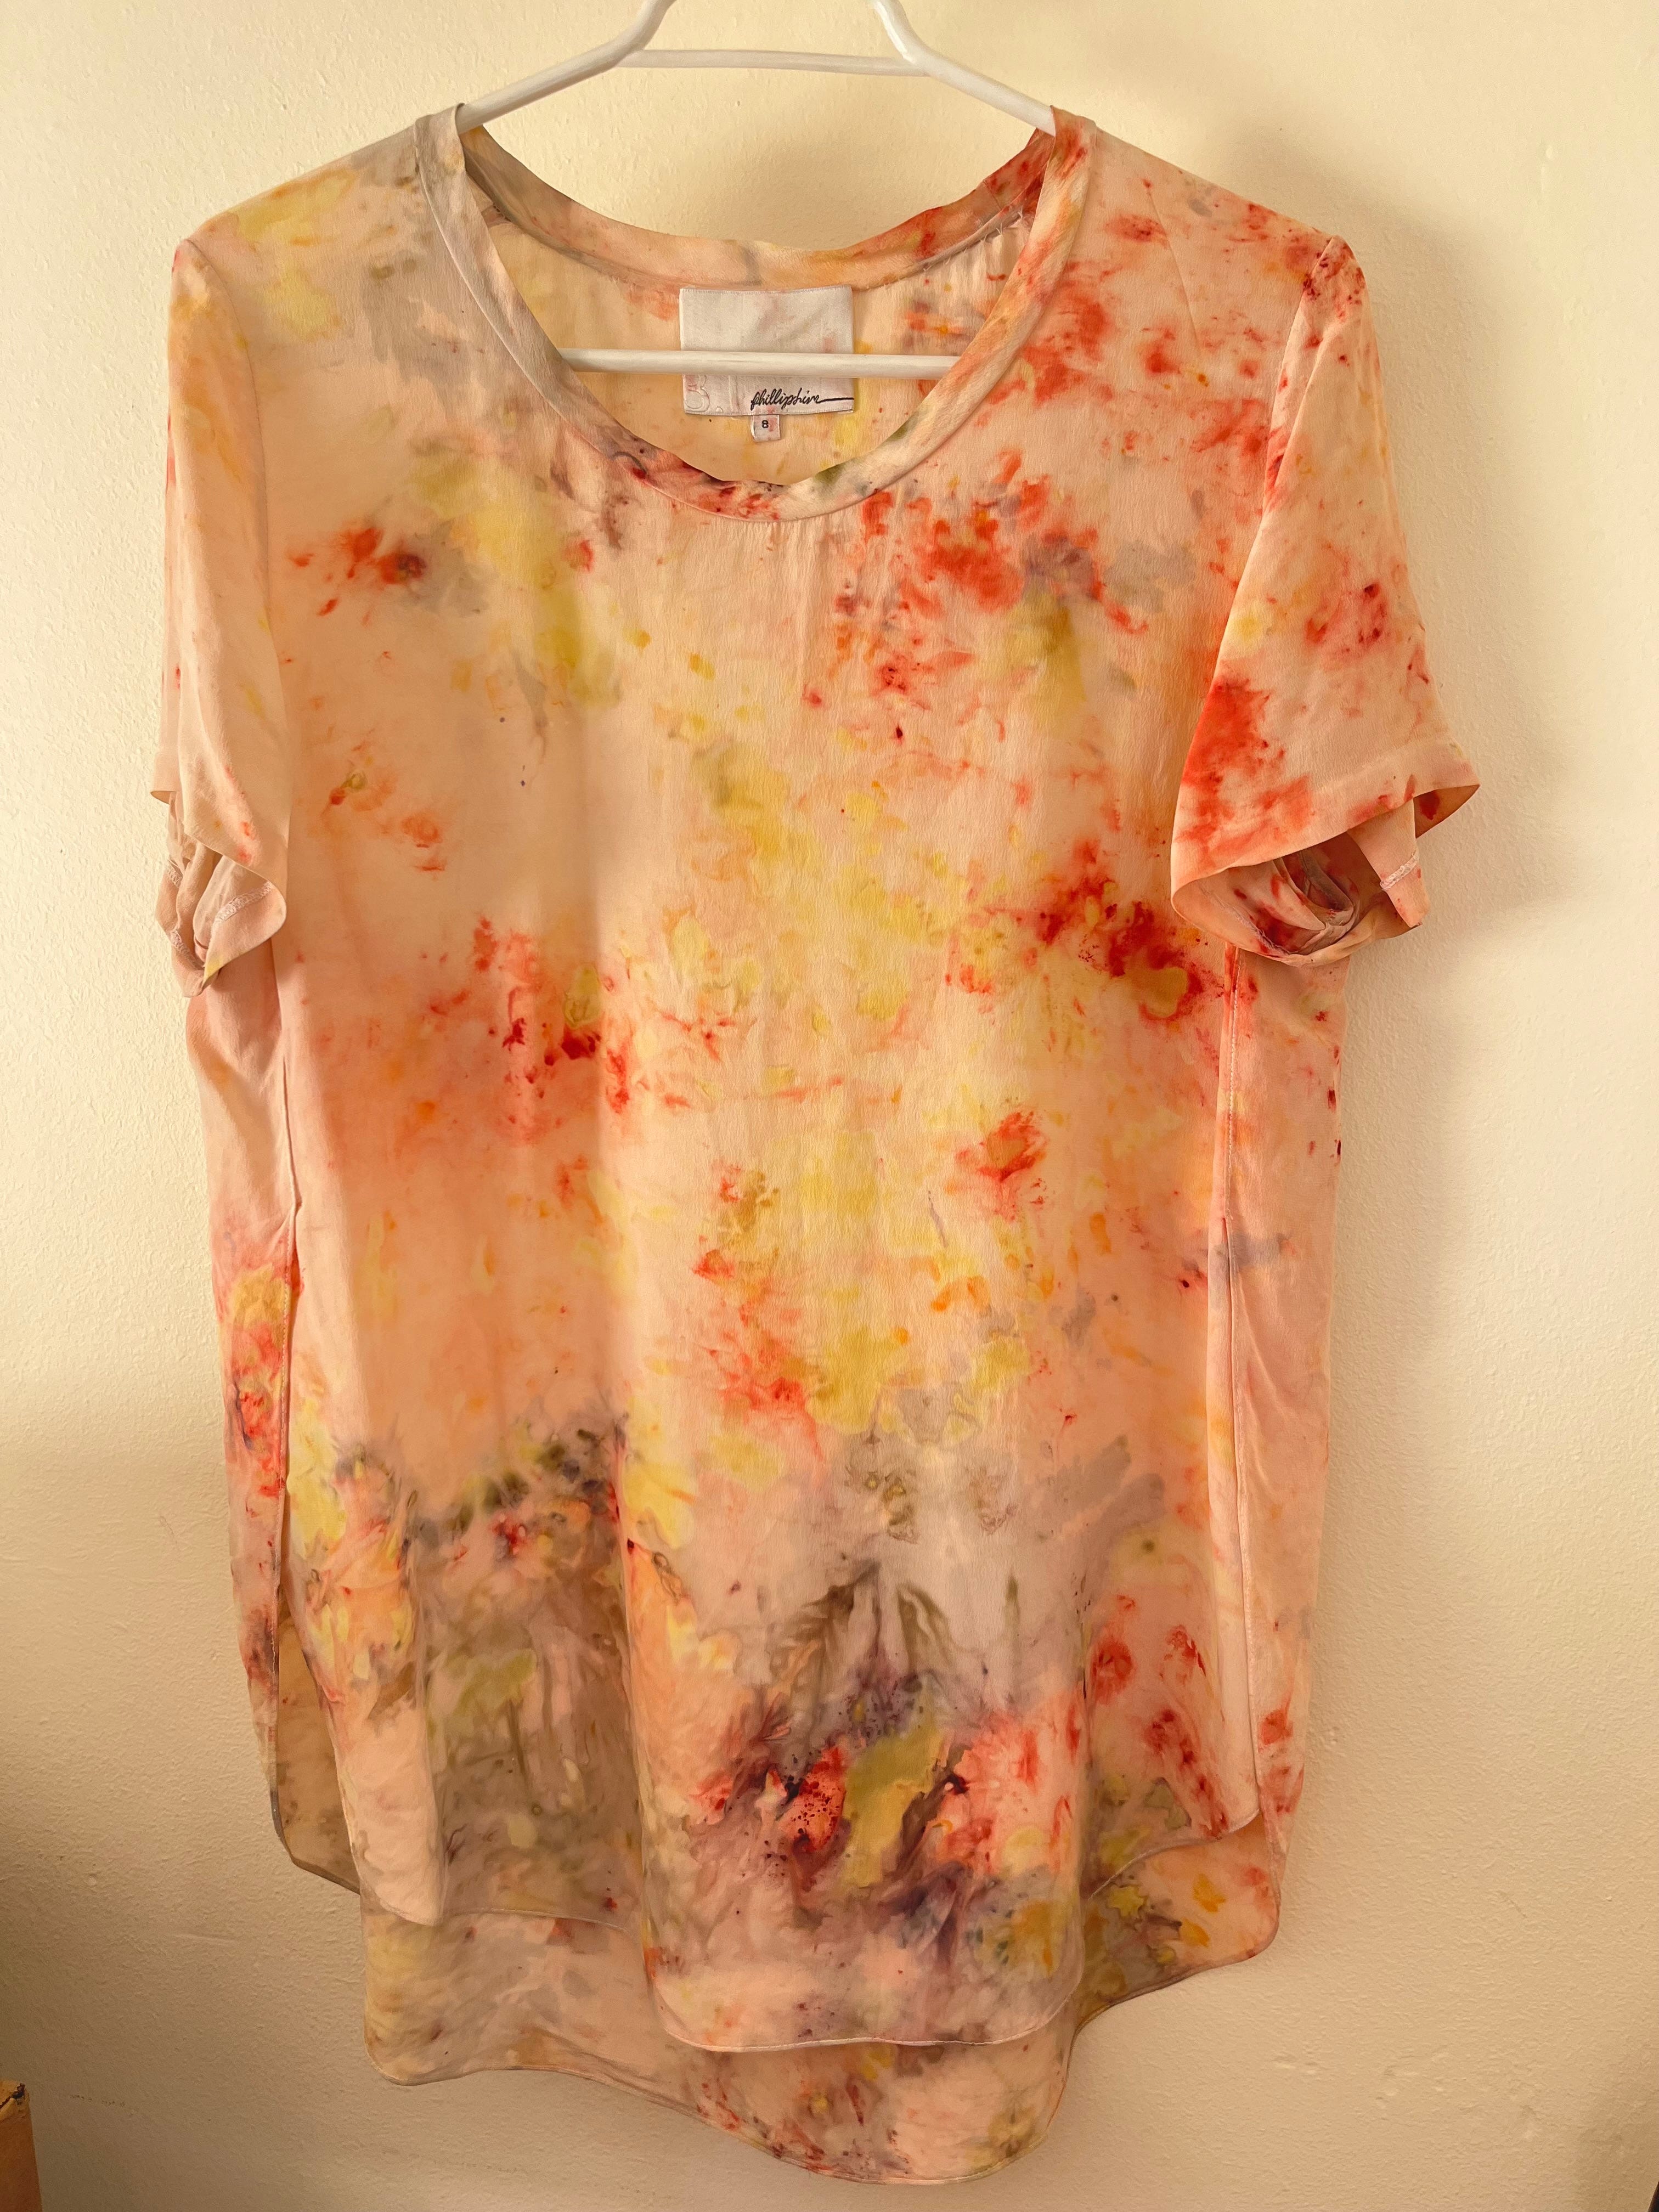
Even as I wasn’t producing much creatively over the summer, natural dyeing is never completely out of my mind. I stopped by some local thrift stores looking for white or undyed clothing and found plenty of options in silk and cotton. (I was surprised by this, since my local thrifting options are not really high-end, but it turns out that there is still a lot of silk out there!) I started with a long, flowy, silk tee with split sides.
Ice dyeing is great for busy days and small spaces since it doesn’t require a lot of equipment or workspace, uses minimal water and no heat, and once set up can be left untouched until it’s done. It works best with frozen flowers, natural dye extracts, or natural dye ice cubes. For the silk tee, I used frozen oxalis flowers and madder extract, then sprinkled a bit of lemon juice, some soda ash, and a tiny amount of iron powder to expand the color range. Oxalis makes a neon yellow green when the dye bath is more acidic and bright orange if the pH is increased to 6 or 7. Madder will be more of an orangey red or pink when acidic, with a higher pH bringing out truer reds and pinks. Iron will bring out earthy greens from oxalis and purples from madder.
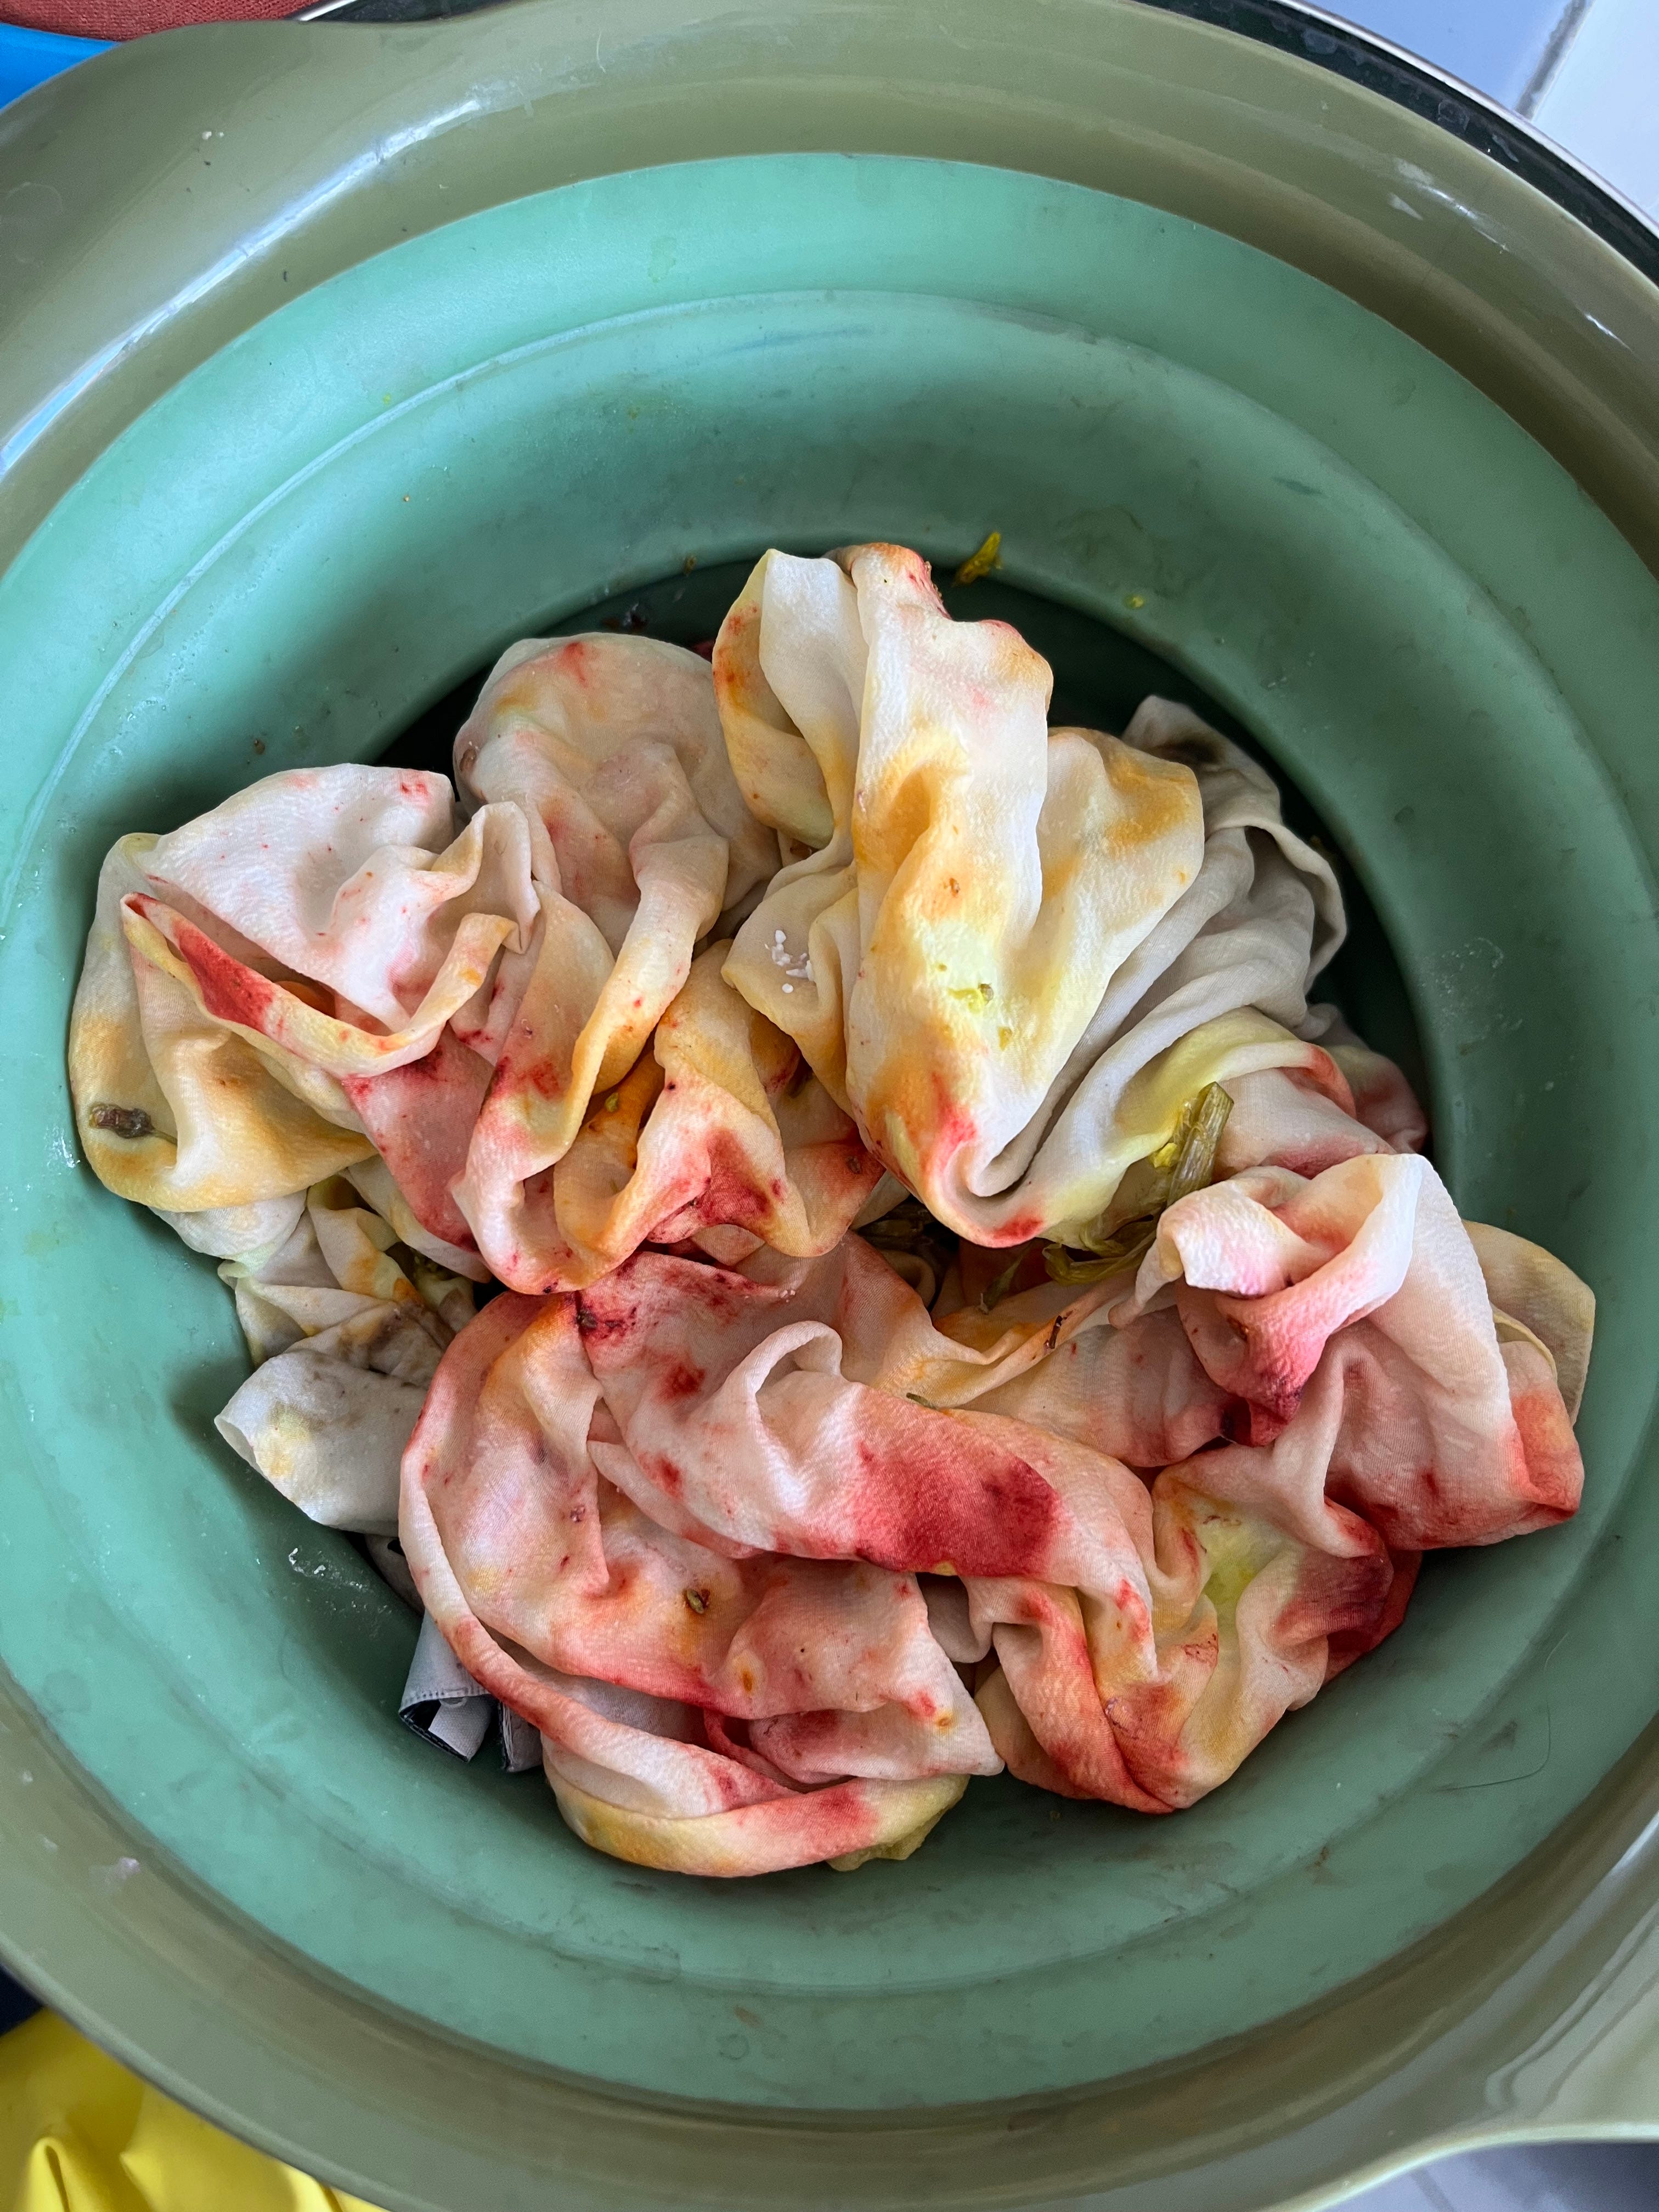
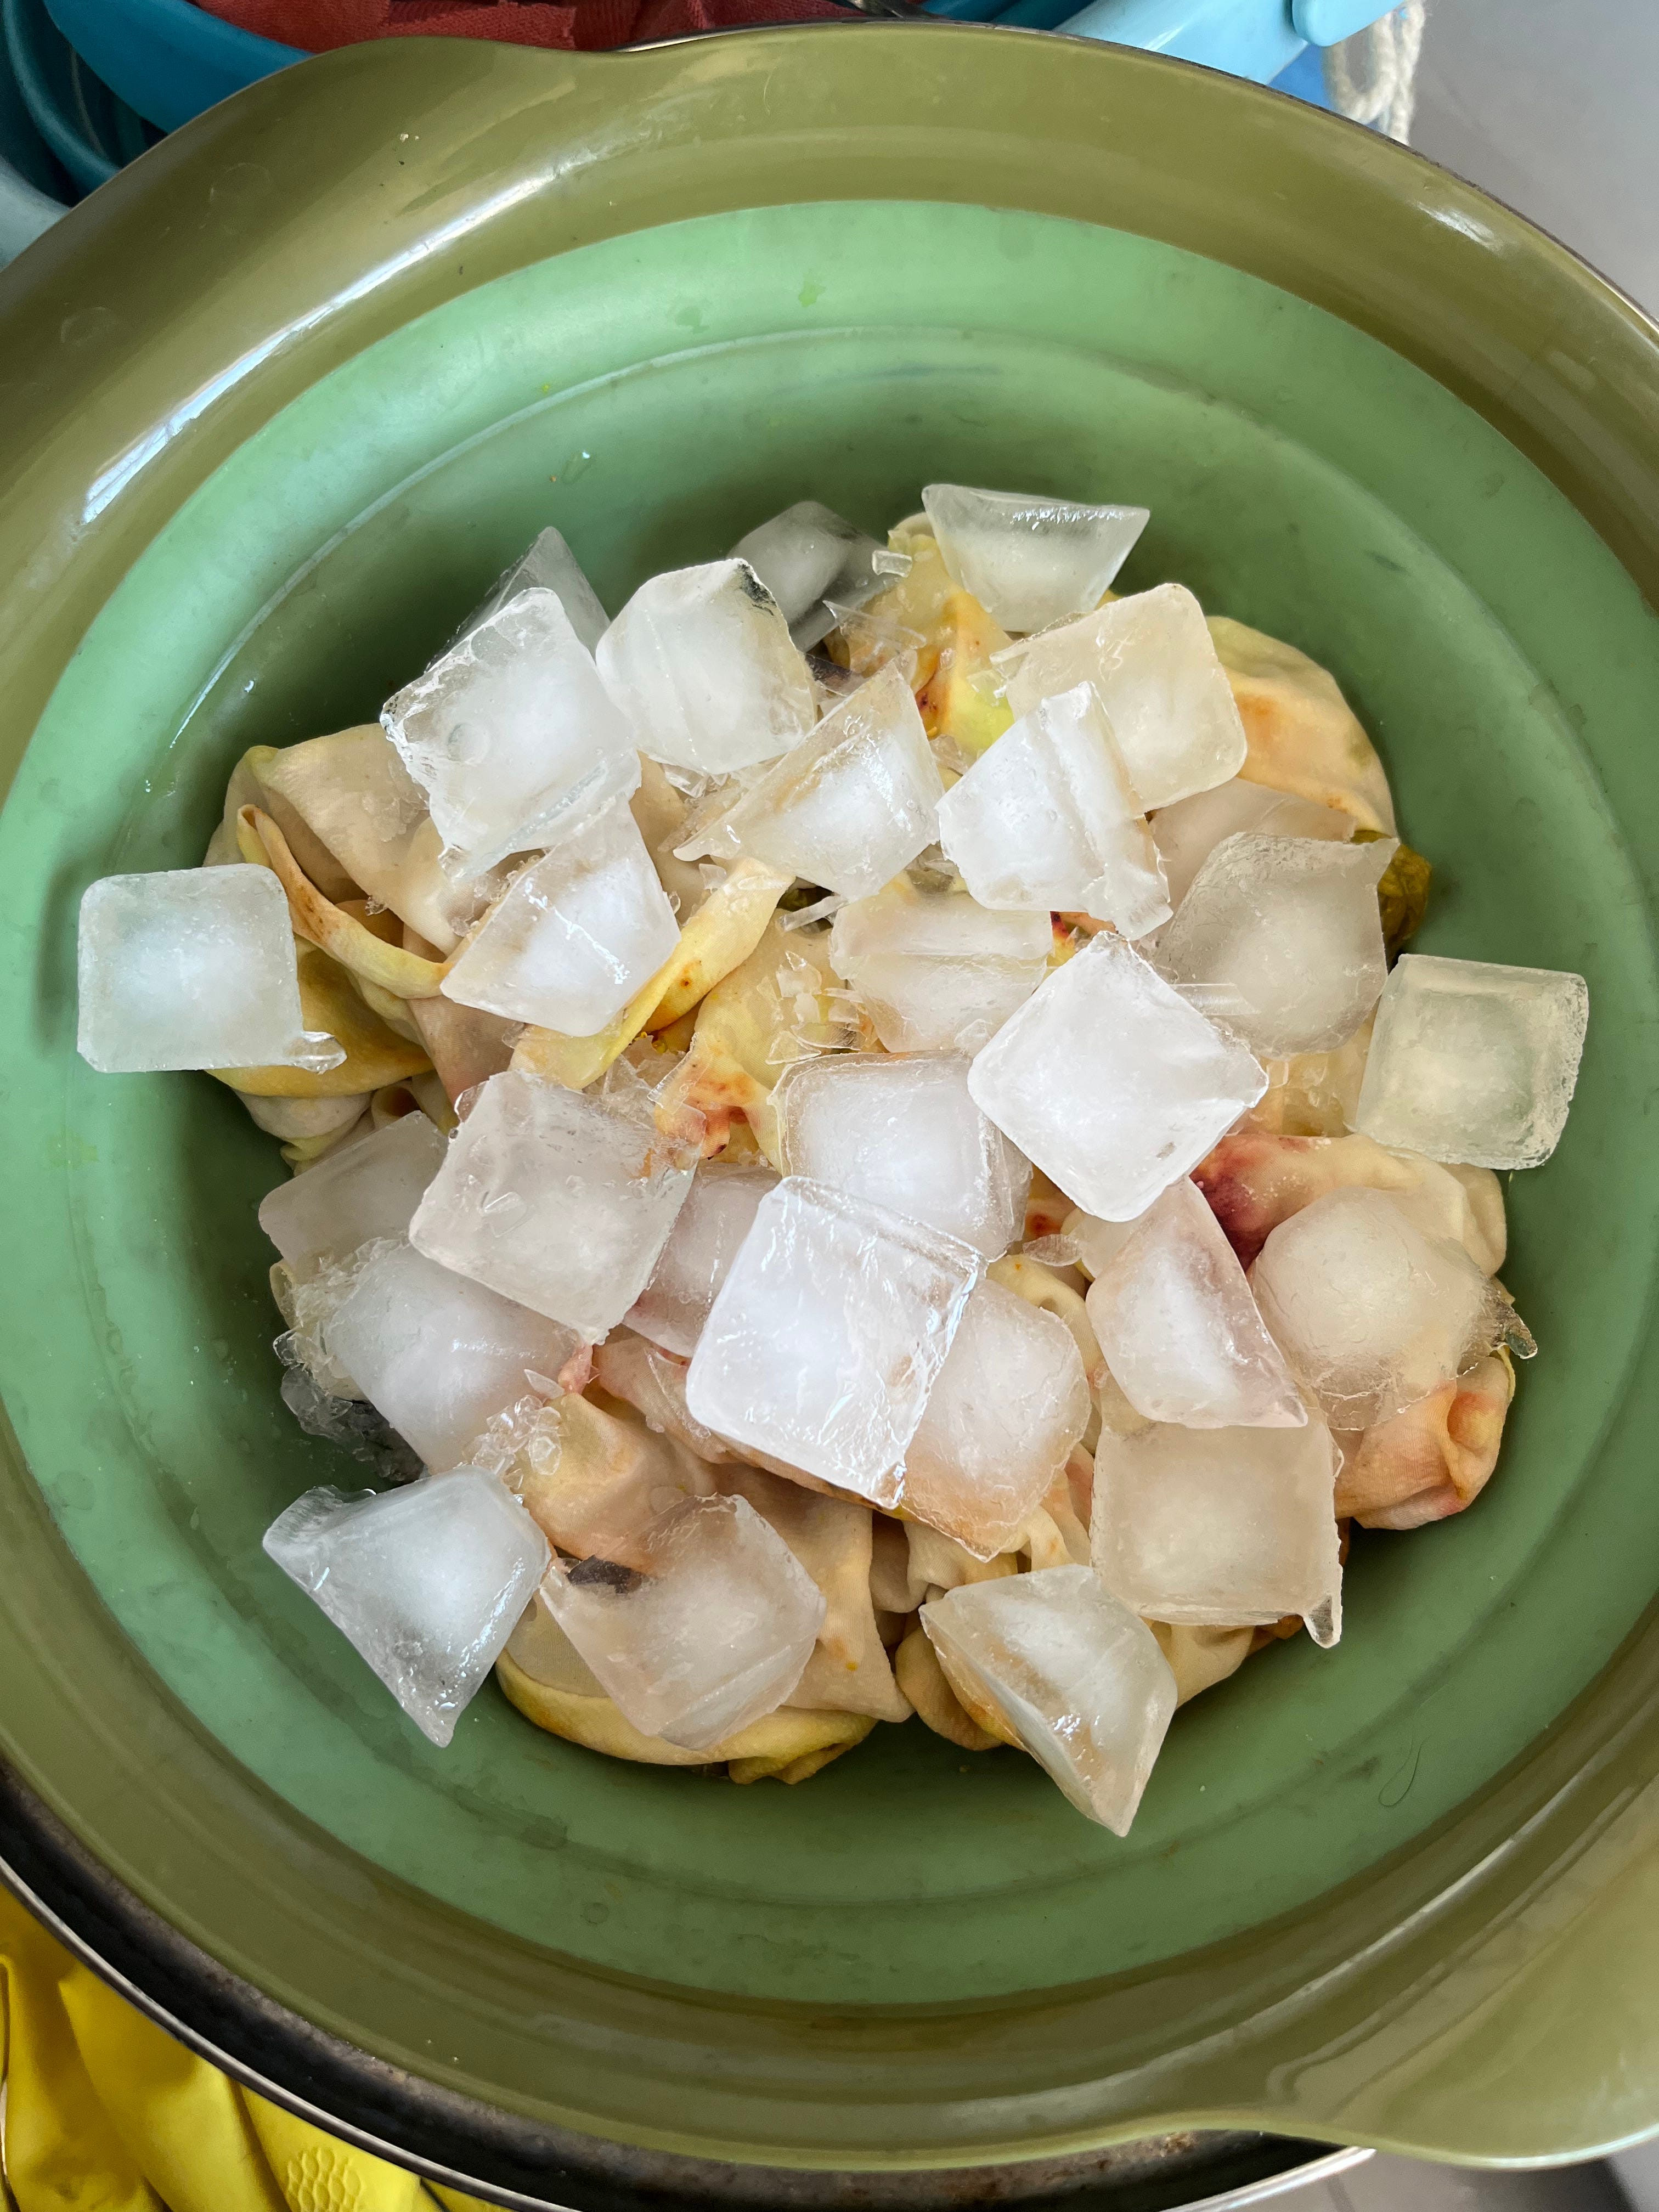
I soaked the tee for a few hours before dyeing, but you can also start with dry fabric (this will affect the final results). Then you just place the fabric in a colander (over a pot or bucket for it to drain into), sprinkle on all the dyes and modifiers, and cover with a layer of ice (or even snow, if you are in a place with snow). Then wait! It’s actually better to do this on a cool day out of the sun because the longer it takes the ice to melt, the better the results will be. I left mine overnight. The final effect is like watercolors, with the color spreading more than it does with bundle dyeing, creating a soft, abstract effect.
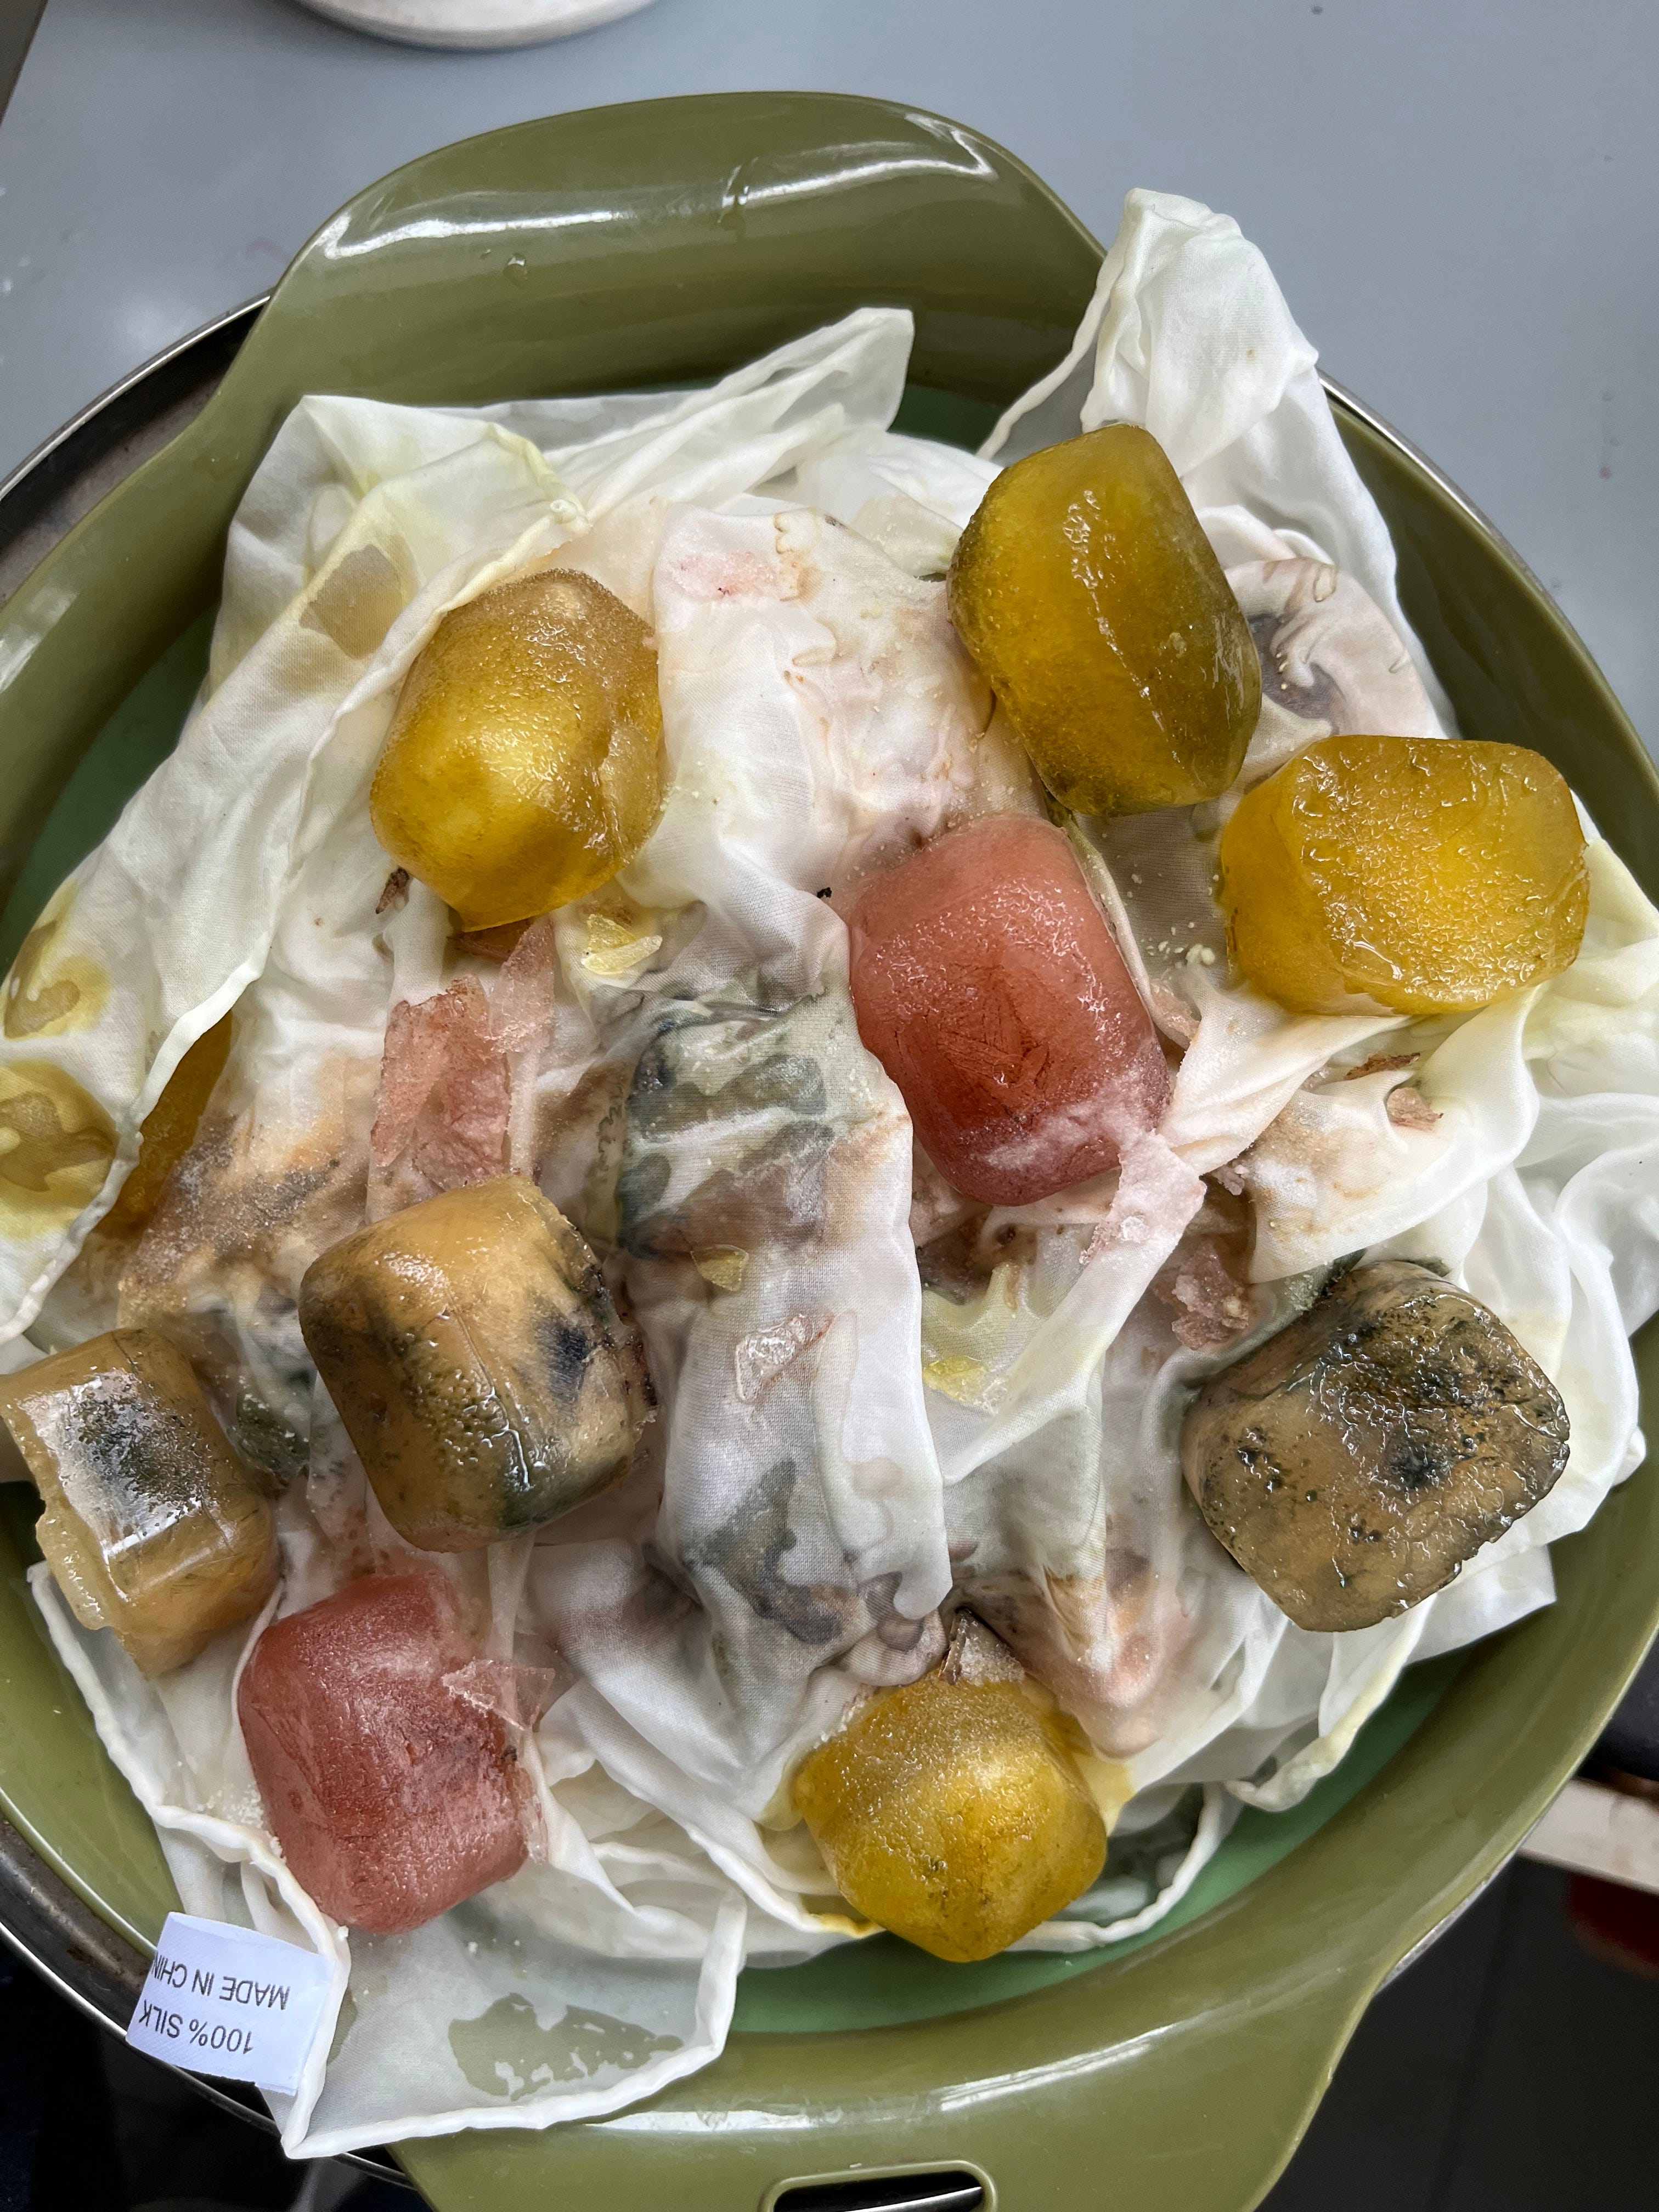
I continued my ice dye experiments with some silk scarves I’m preparing for upcoming shows and made some ice cubes with peumo, madder, yerba mate, oxalis, and cochineal dye baths (these dye baths were left over from other projects, but you could also make mini dye baths for this project). Here the effect is more like marbling, definitely different from the results I’ve obtained from other color techniques like bundle dyeing or tie dyeing.


If you want to try ice dyeing, you need:
a colander
a pot or bucket to drain into
ice cube trays (optional)
scoured and mordanted textiles
natural dye materials: frozen flowers, natural dye extracts and/or natural dye ice cubes
color modifiers: lemon juice, baking soda or soda ash, ferrous sulfate
Wet out the fabric and place in the colander. Sprinkle with dye materials and modifiers however you wish, making sure color gets distributed throughout the fabric. If not using dye ice cubes, add a layer of regular ice on top. Wait until the ice melts (do this somewhere cool to slow the process down), then rinse and hang to dry.
If you want more ideas for quick, easy projects to help you feel inspired by natural color, I wrote more about that here:
Artist Dates

This newsletter has English and Spanish versions. To choose which language you receive, visit your settings on Substack, find this newsletter under Subscriptions, and select the language(s) you want. Leer en español aquí. I had hoped to send out two newsletters this month, but unsurprisingly my time in the United States has been busy, between teaching my …

News
Expo Teje is coming up May 4-5! Come see me there with new ice dyed and bundle dyed scarves, new bundle dyed yarn, and a full rainbow of solid colors on Chilean wool.
Thanks for reading! I hope to start sending newsletters more regularly again now that I’m feeling more inspired, but it’s a busy year for me so I’ll see how it goes. I’d always love to hear your thoughts or see your projects, especially if you try ice dyeing! You can leave a comment at the end of this post or reply to the email.
