


Indigo and Natural Dye Failure
There's no such thing, but also I'm sad about my indigo vat
This newsletter has English and Spanish versions. To choose which language you receive, visit your settings on Substack, find this newsletter under Subscriptions, and select the language(s) you want.
Leer en español aquí.
I truly believe that there’s no such thing as failure in natural dyeing. Because I consider my work to be revealing rather than creating colors, if I reveal a color, any color, it is a success and it’s an experience I can learn from. However, as a dyer trying to become more “professional” (or at least be able to sell the yarn I dye) and with several years of experience, I work hard to document my dye procedures and results to be able to create repeatable1 colors. I also research dye plants, the chemistry involved in dye plants and natural dye processes, and follow the work of other, more experienced dyers to learn as much as I can about how to get the results I want. I want other people, especially my customers, to trust my finished products. I know knitting is a significant investment of time and I want finished projects to hold up for years to come.
So when the indigo vat I made last week failed spectacularly, my first thought was to not say a single word about it. I don’t want anyone to think that I don’t know what I’m doing! I want to be able to sell my indigo dyed yarns, and to create beautiful shades of blue with minimal crocking, even color application, and no damage to the wool. Indigo is not the easiest dye to work with, especially with protein fibers like wool, and I don’t have as much experience as I’d like (mostly because it’s the most expensive dye for me to work with), but when I am able to make a vat I work hard to get the best result I can.
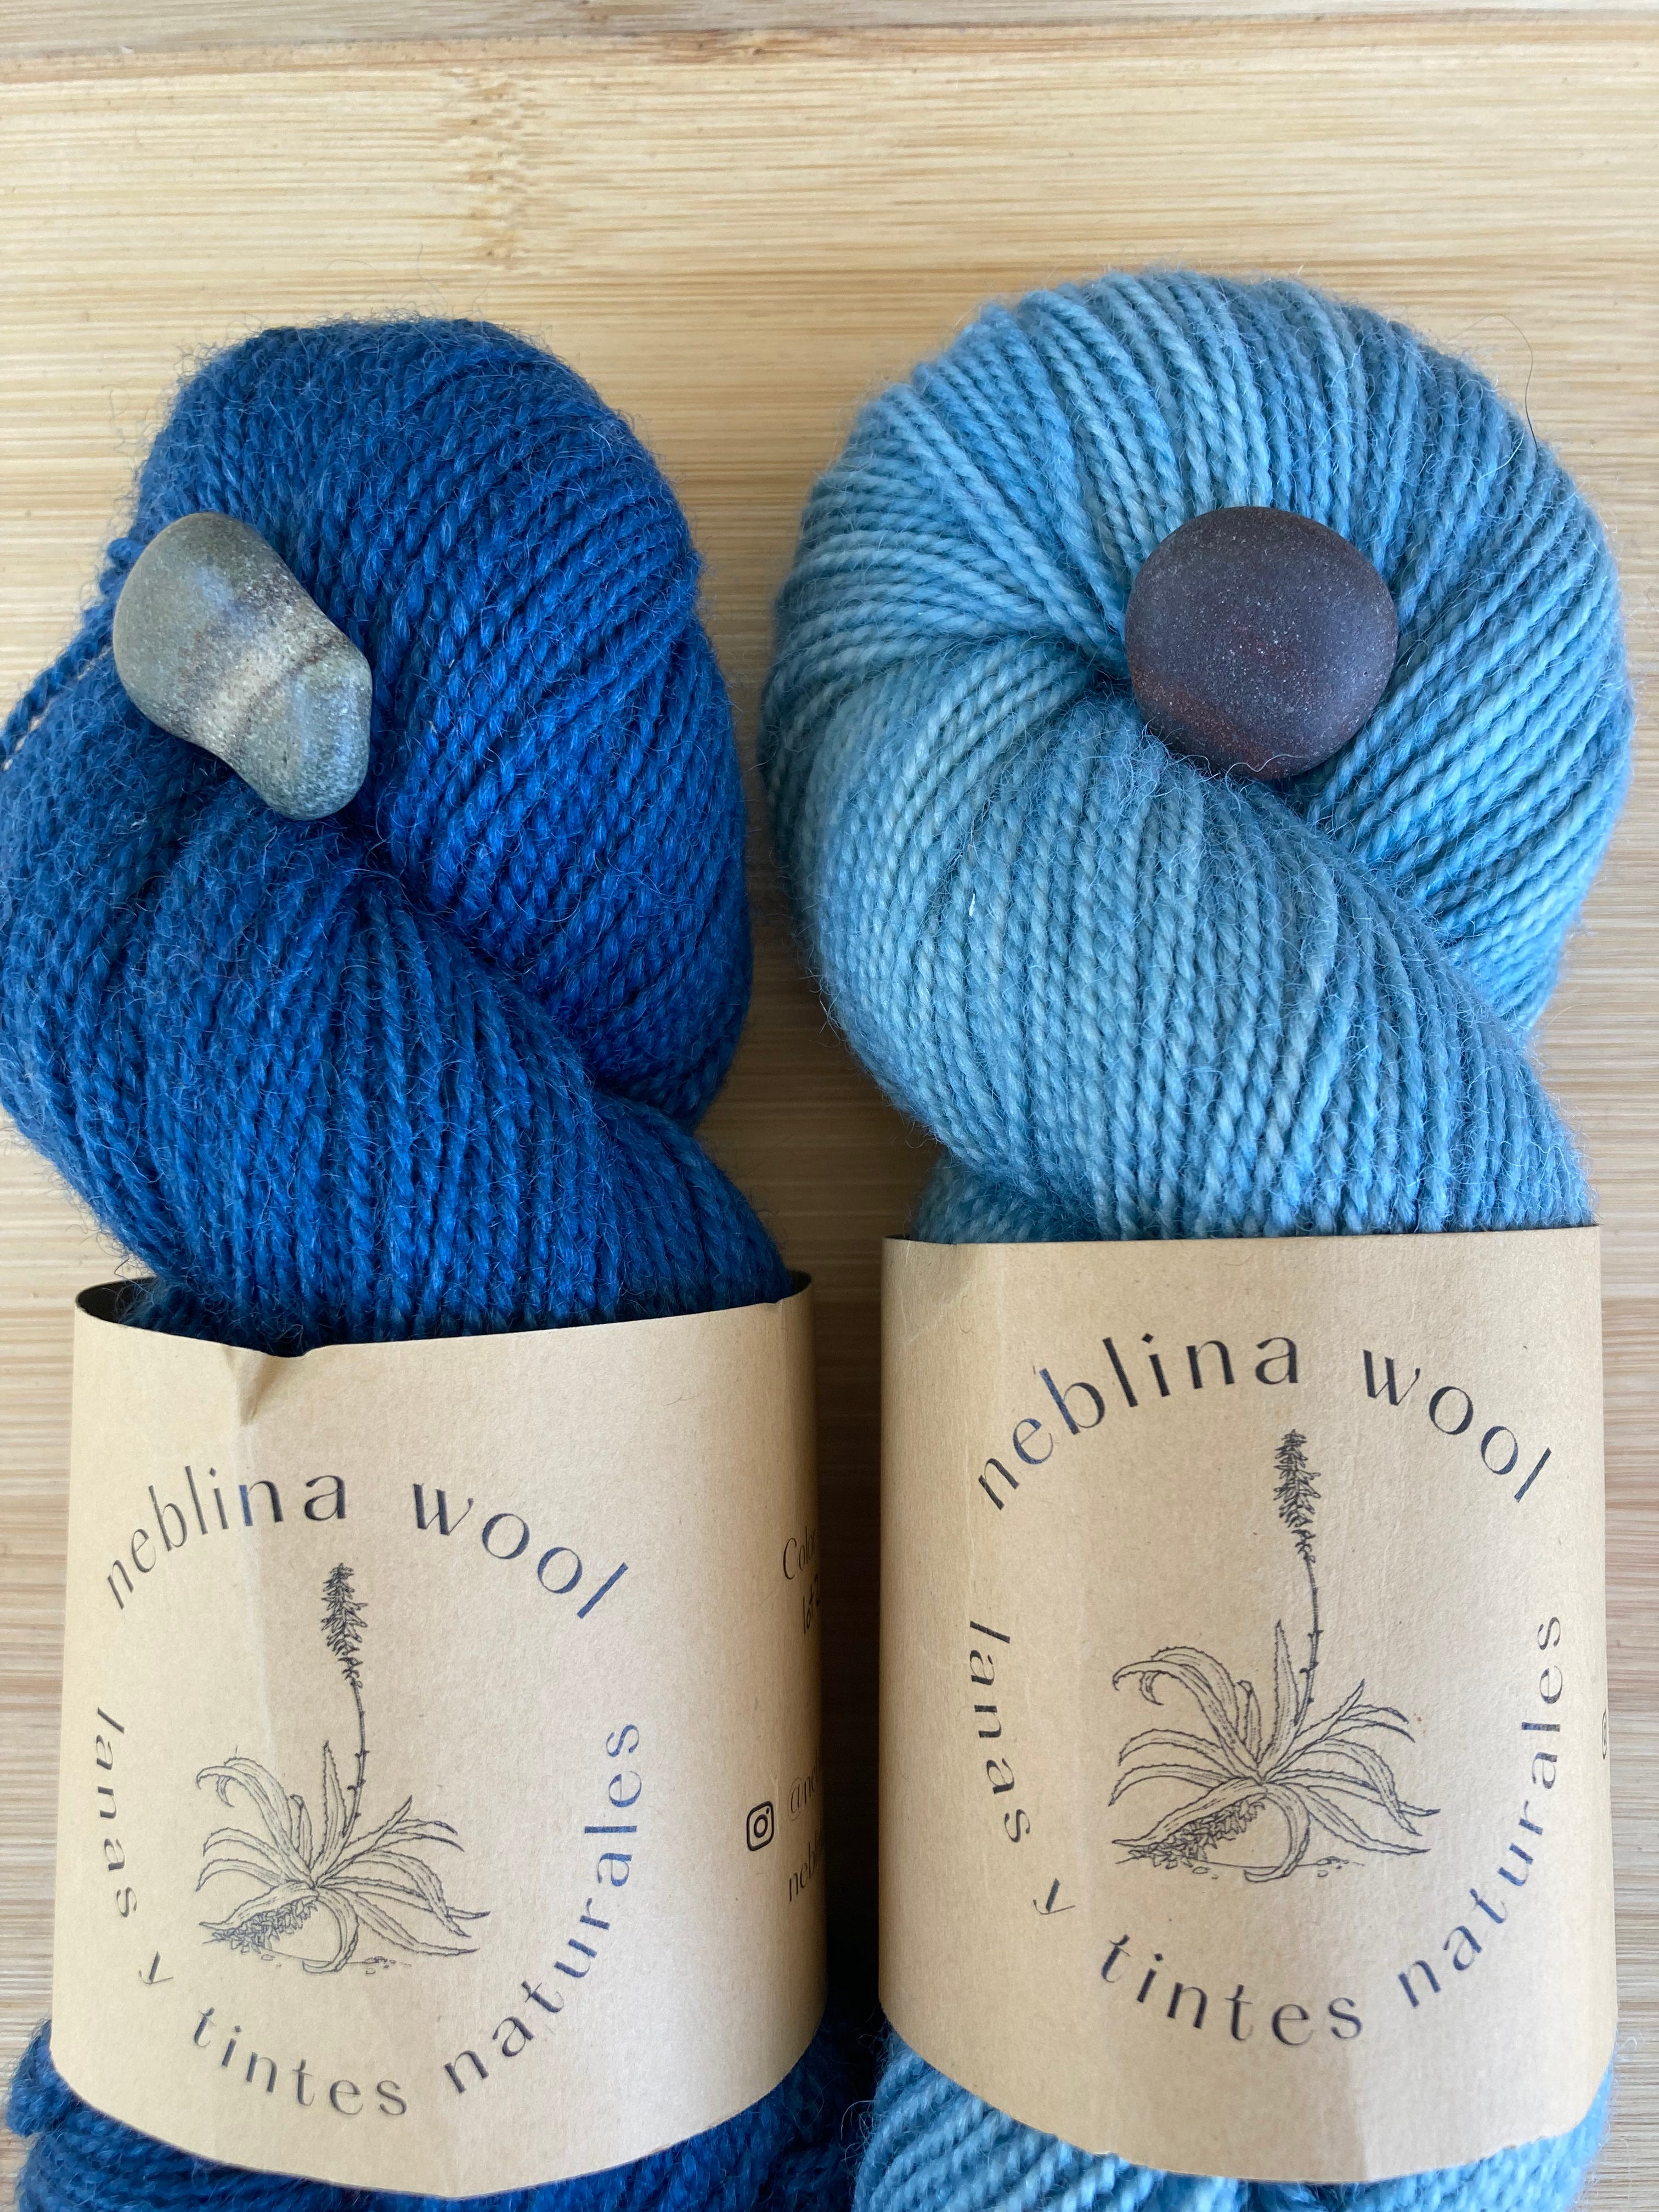
The first time I worked with indigo was last July, at my parents’ house in Ohio at the height of summer. I’d avoided working with indigo until then because it sounded difficult, both in terms of dye skills and knowledge and logistically, as I don’t want to end up with blue stains all over my apartment. I ordered indigo pigment from Botanical Colors and followed their instructions to make a vat and it was an absolutely magical experience. With a 16 liter vat and 100g of indigo, I dyed 8 skeins a bright, saturated blue, and then overdyed 8 yellow skeins (dyed with pomegranate) to make a gorgeous blue-green. (I later learned that it’s better to dye indigo and then a mordant dye, although I got beautiful results both ways). I probably could have kept going to exhaust the vat, but due to the time constraints of my vacation I stopped there. This success gave me the courage to try indigo dyeing in my apartment, and I made a successful vat in Chile last September, just as temperatures were warming up in austral spring.

To talk about what went wrong this time, first I’ll talk about the chemistry of indigo dyeing. Indigo, unlike other natural dyes, is a pigment, which means it is not soluble in water. Before it can be used to dye textiles, it must be made soluble using a chemical reduction process. The essential ingredients in an indigo vat are the indigo pigment, an alkali that creates the environment necessary for reduction to take place, and a reduction material which removes oxygen from the vat and forces the indigo to become soluble. Once it is soluble, the dye can penetrate the fiber. When it is removed from the vat, it oxidizes and the indigo becomes insoluble again, but now it is fixed inside the fiber. Hot water contains less oxygen than cold water, so using hot water in a warm environment will help the reduction happen more quickly. I think this is why my summer vats were more successful.
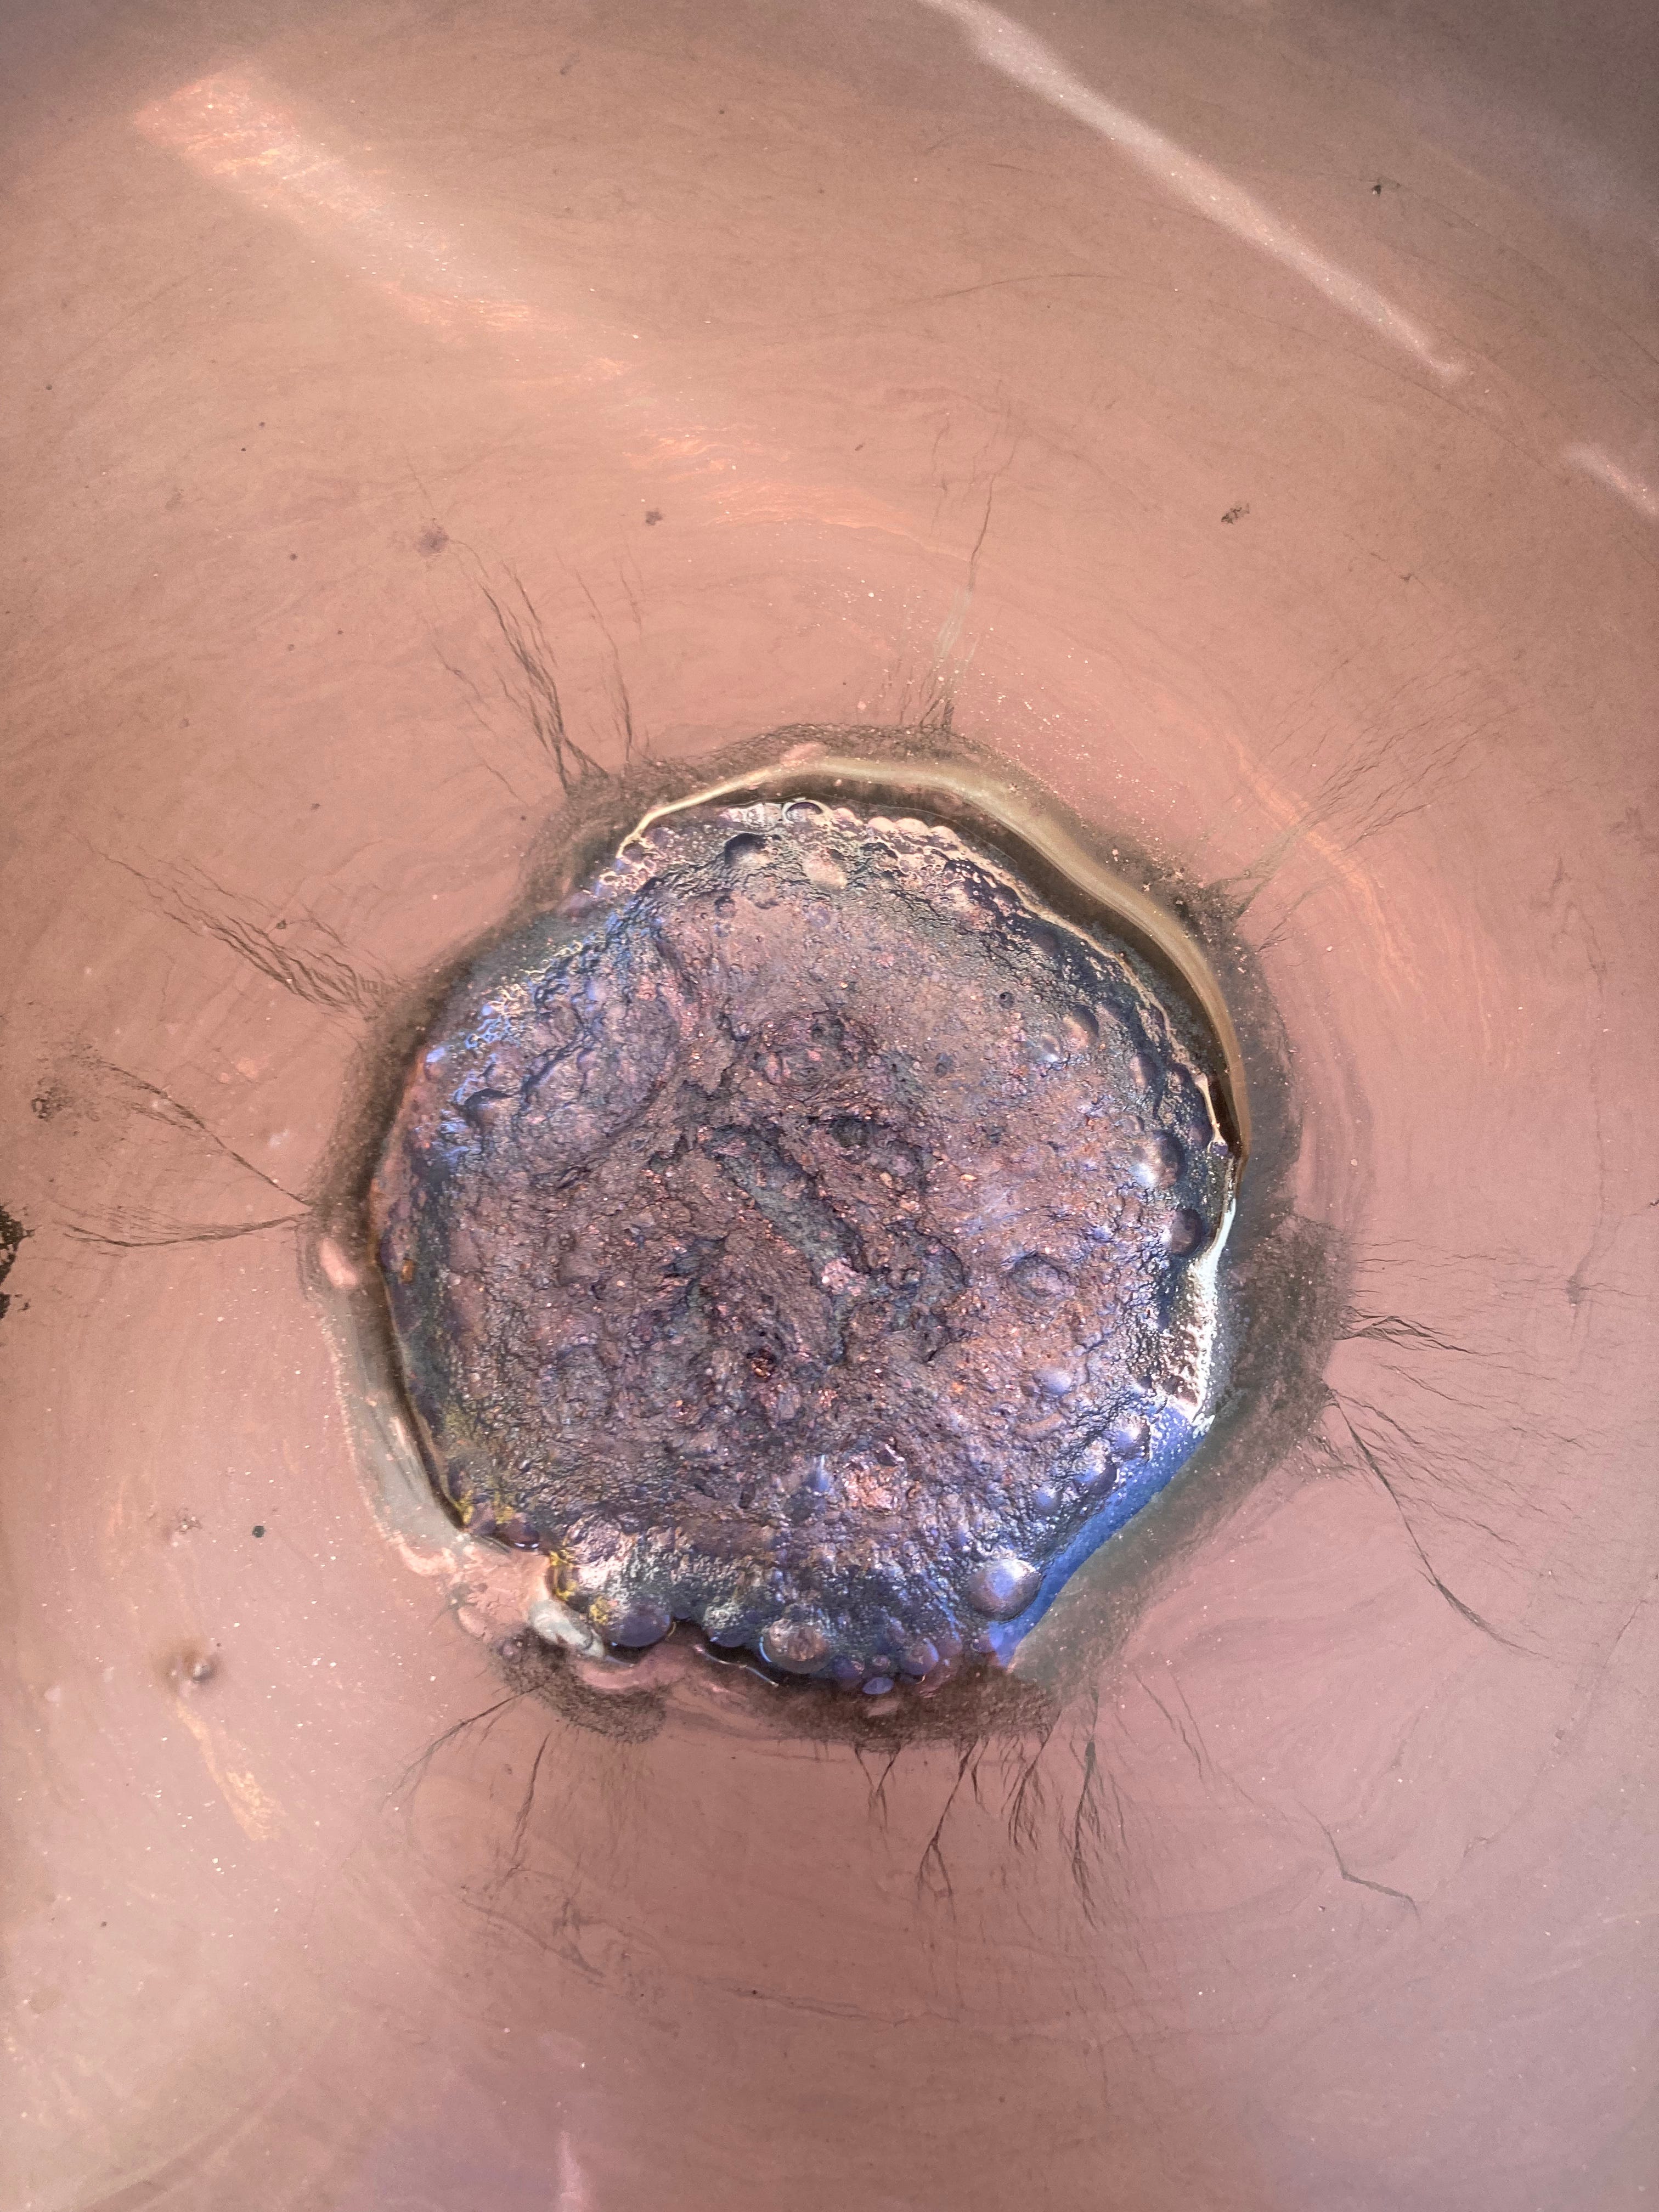
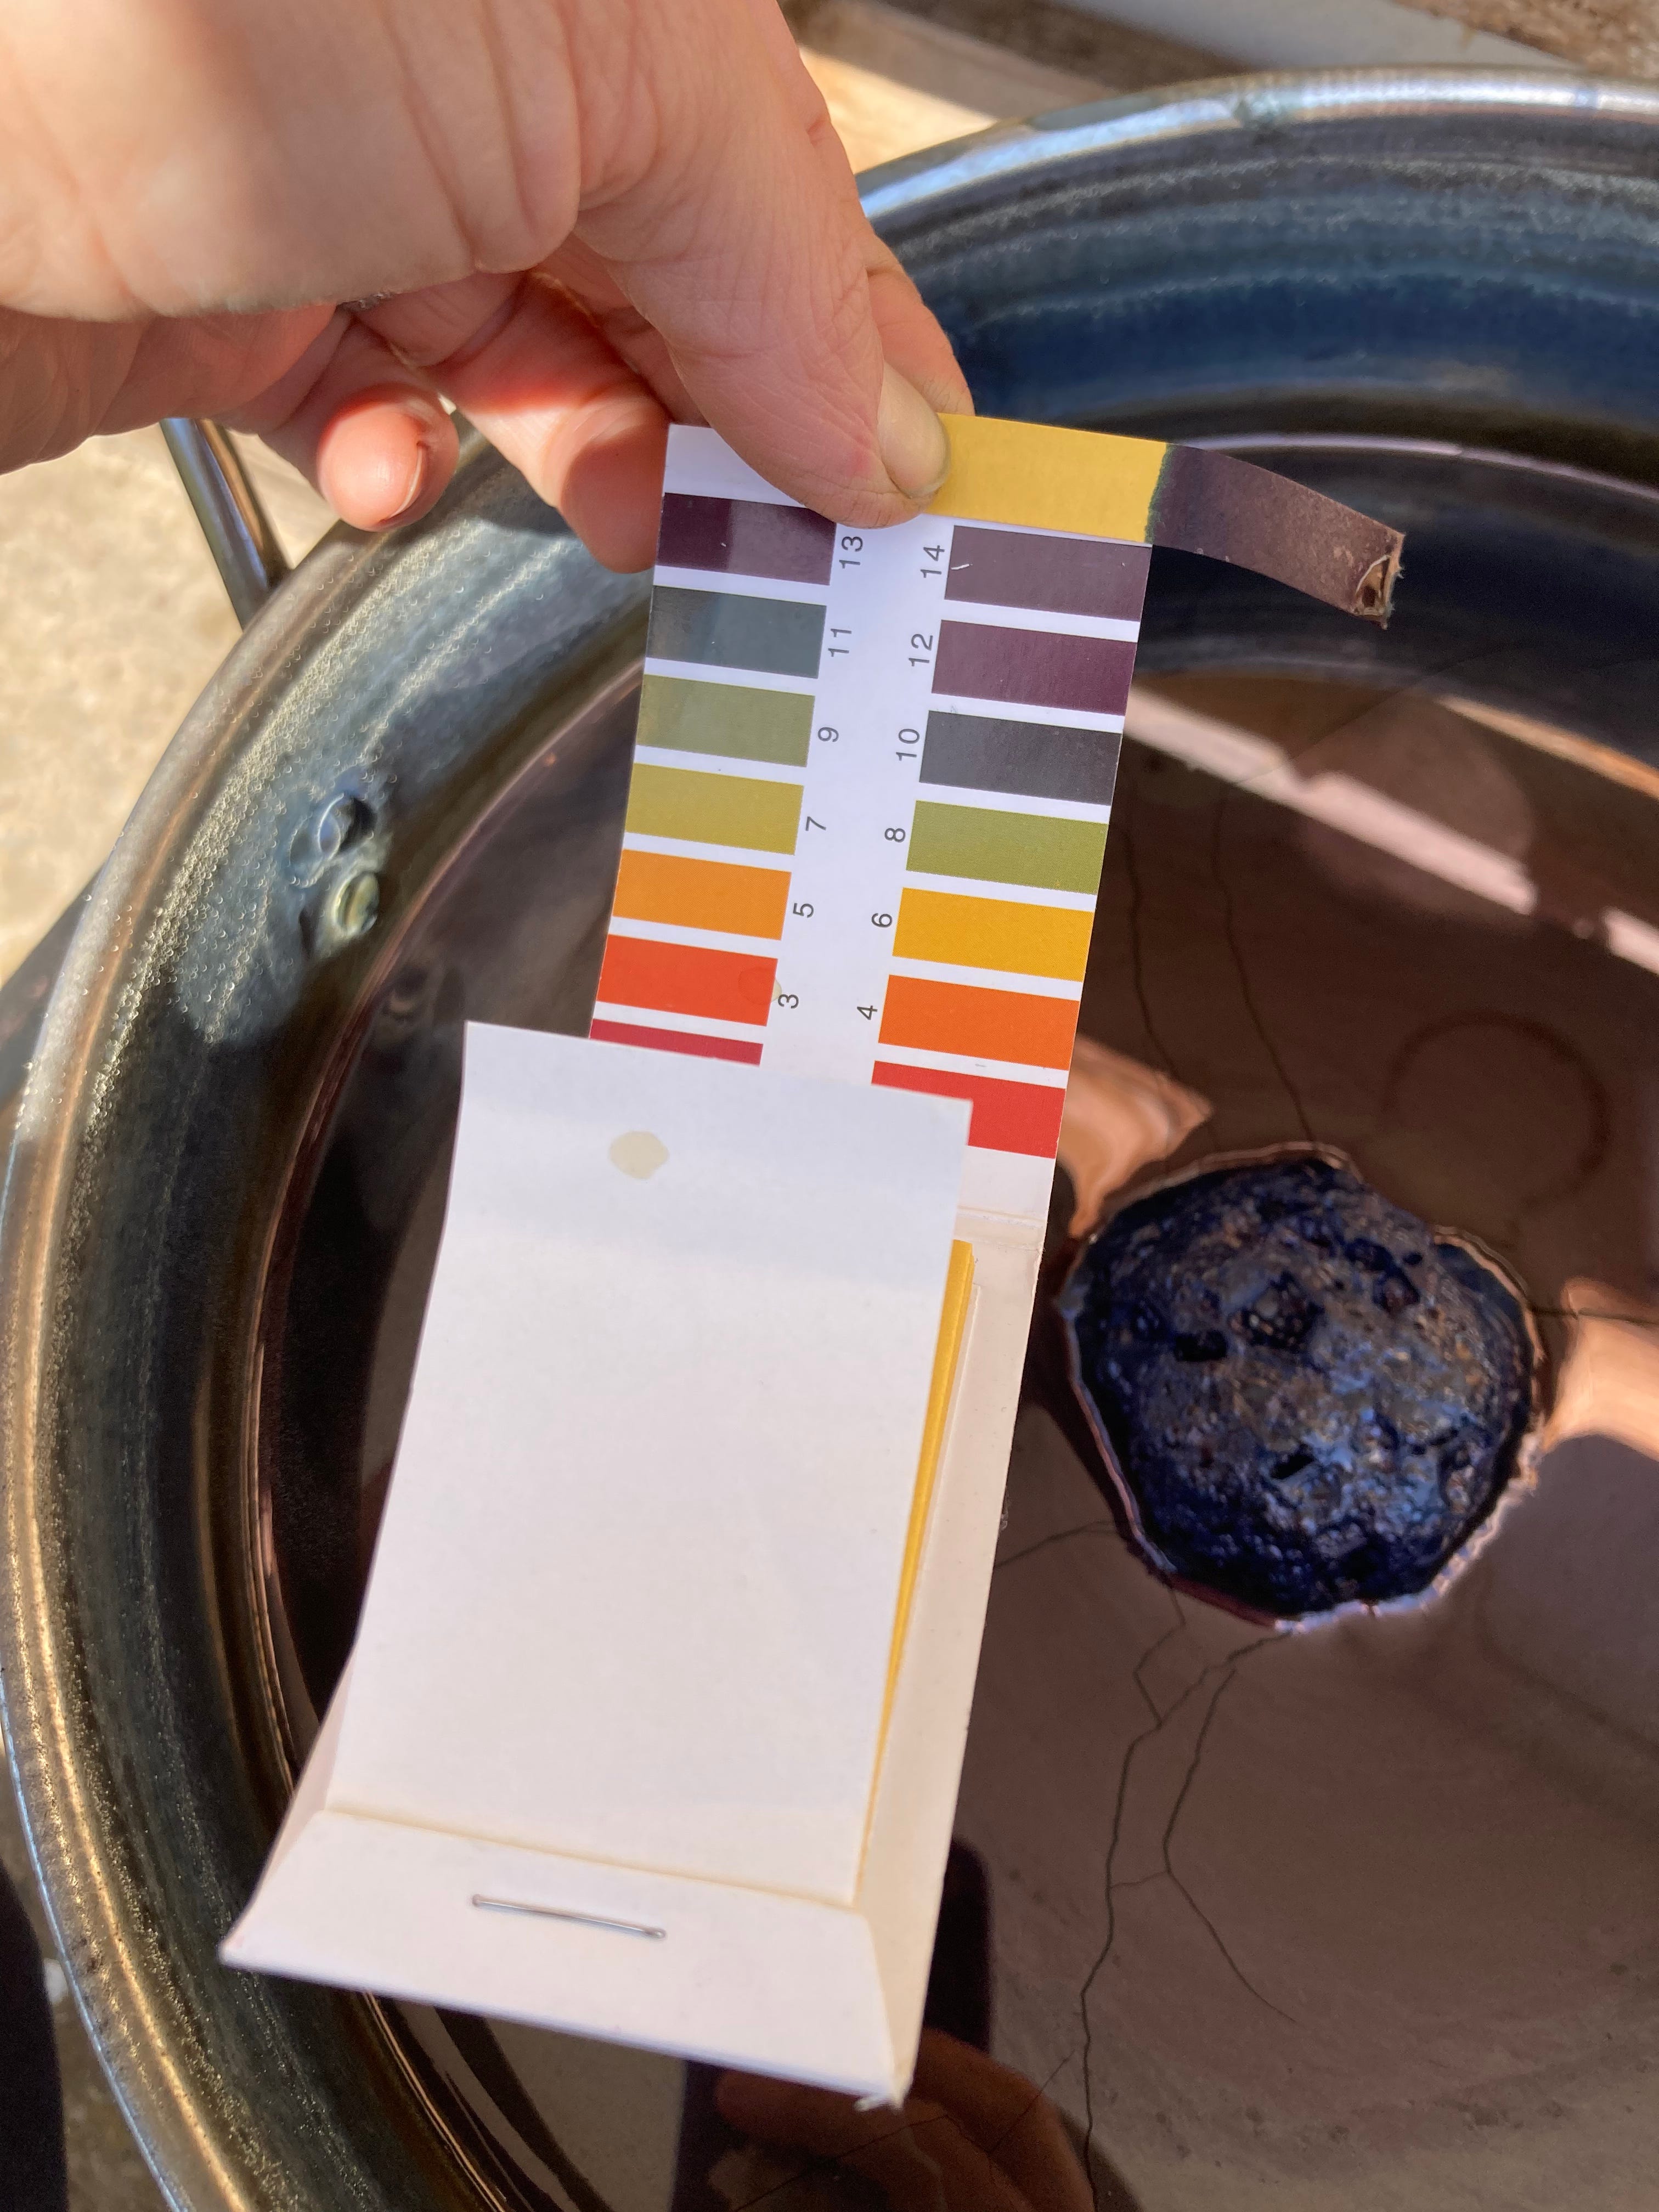
There are several ways to create indigo vats, but I chose the 1-2-3 quick reduction vat (introduced by Michel Garcia) because it can be prepared quickly and uses reduction materials that are safe to work with (with proper precautions). I used fructose and calcium hydroxide to create the reduction. I added all the ingredients according to procedure and saw a nice looking indigo flower form, indicating that the reduction had taken place. It was a warm sunny day, and although it rarely gets very hot here because I live so close to the ocean, it was probably in the upper 60s/low 70s F (20-23°C). I let the vat rest overnight for the indigo to cure and become stronger. Overnight temperatures are in the mid-50s (12-13°C) right now, so the vat probably got a bit cold overnight and perhaps went out of reduction. The next day I heated it up again, but the pH was way too low- around 8 or 9 (normally I use my electronic pH meter to get an accurate reading, but unfortunately I dropped it in the vat and broke it, so I switched to using indicator strips). Indigo vats need a pH of 12 or so to properly reduce. I added more calcium hydroxide (I wasn’t sure exactly how much to add, and my reference materials weren’t specific about this, so I added 1 tbsp at a time until the pH was high enough. Then I “fed” the vat with some more fructose, stirred and waited. The whole time the vat still looked like a properly functioning indigo vat- the flower formed, along with a coppery sheen on the surface of the vat, and the liquid below was a clear yellow color indicating that reduction had taken place. Since my vat looked right and the pH was correct, I added some gelatin to lower the pH a bit to protect my wool (protein fibers are damaged by high alkalinity, so after reducing the indigo the pH should be lowered to about 10 for dyeing wool).
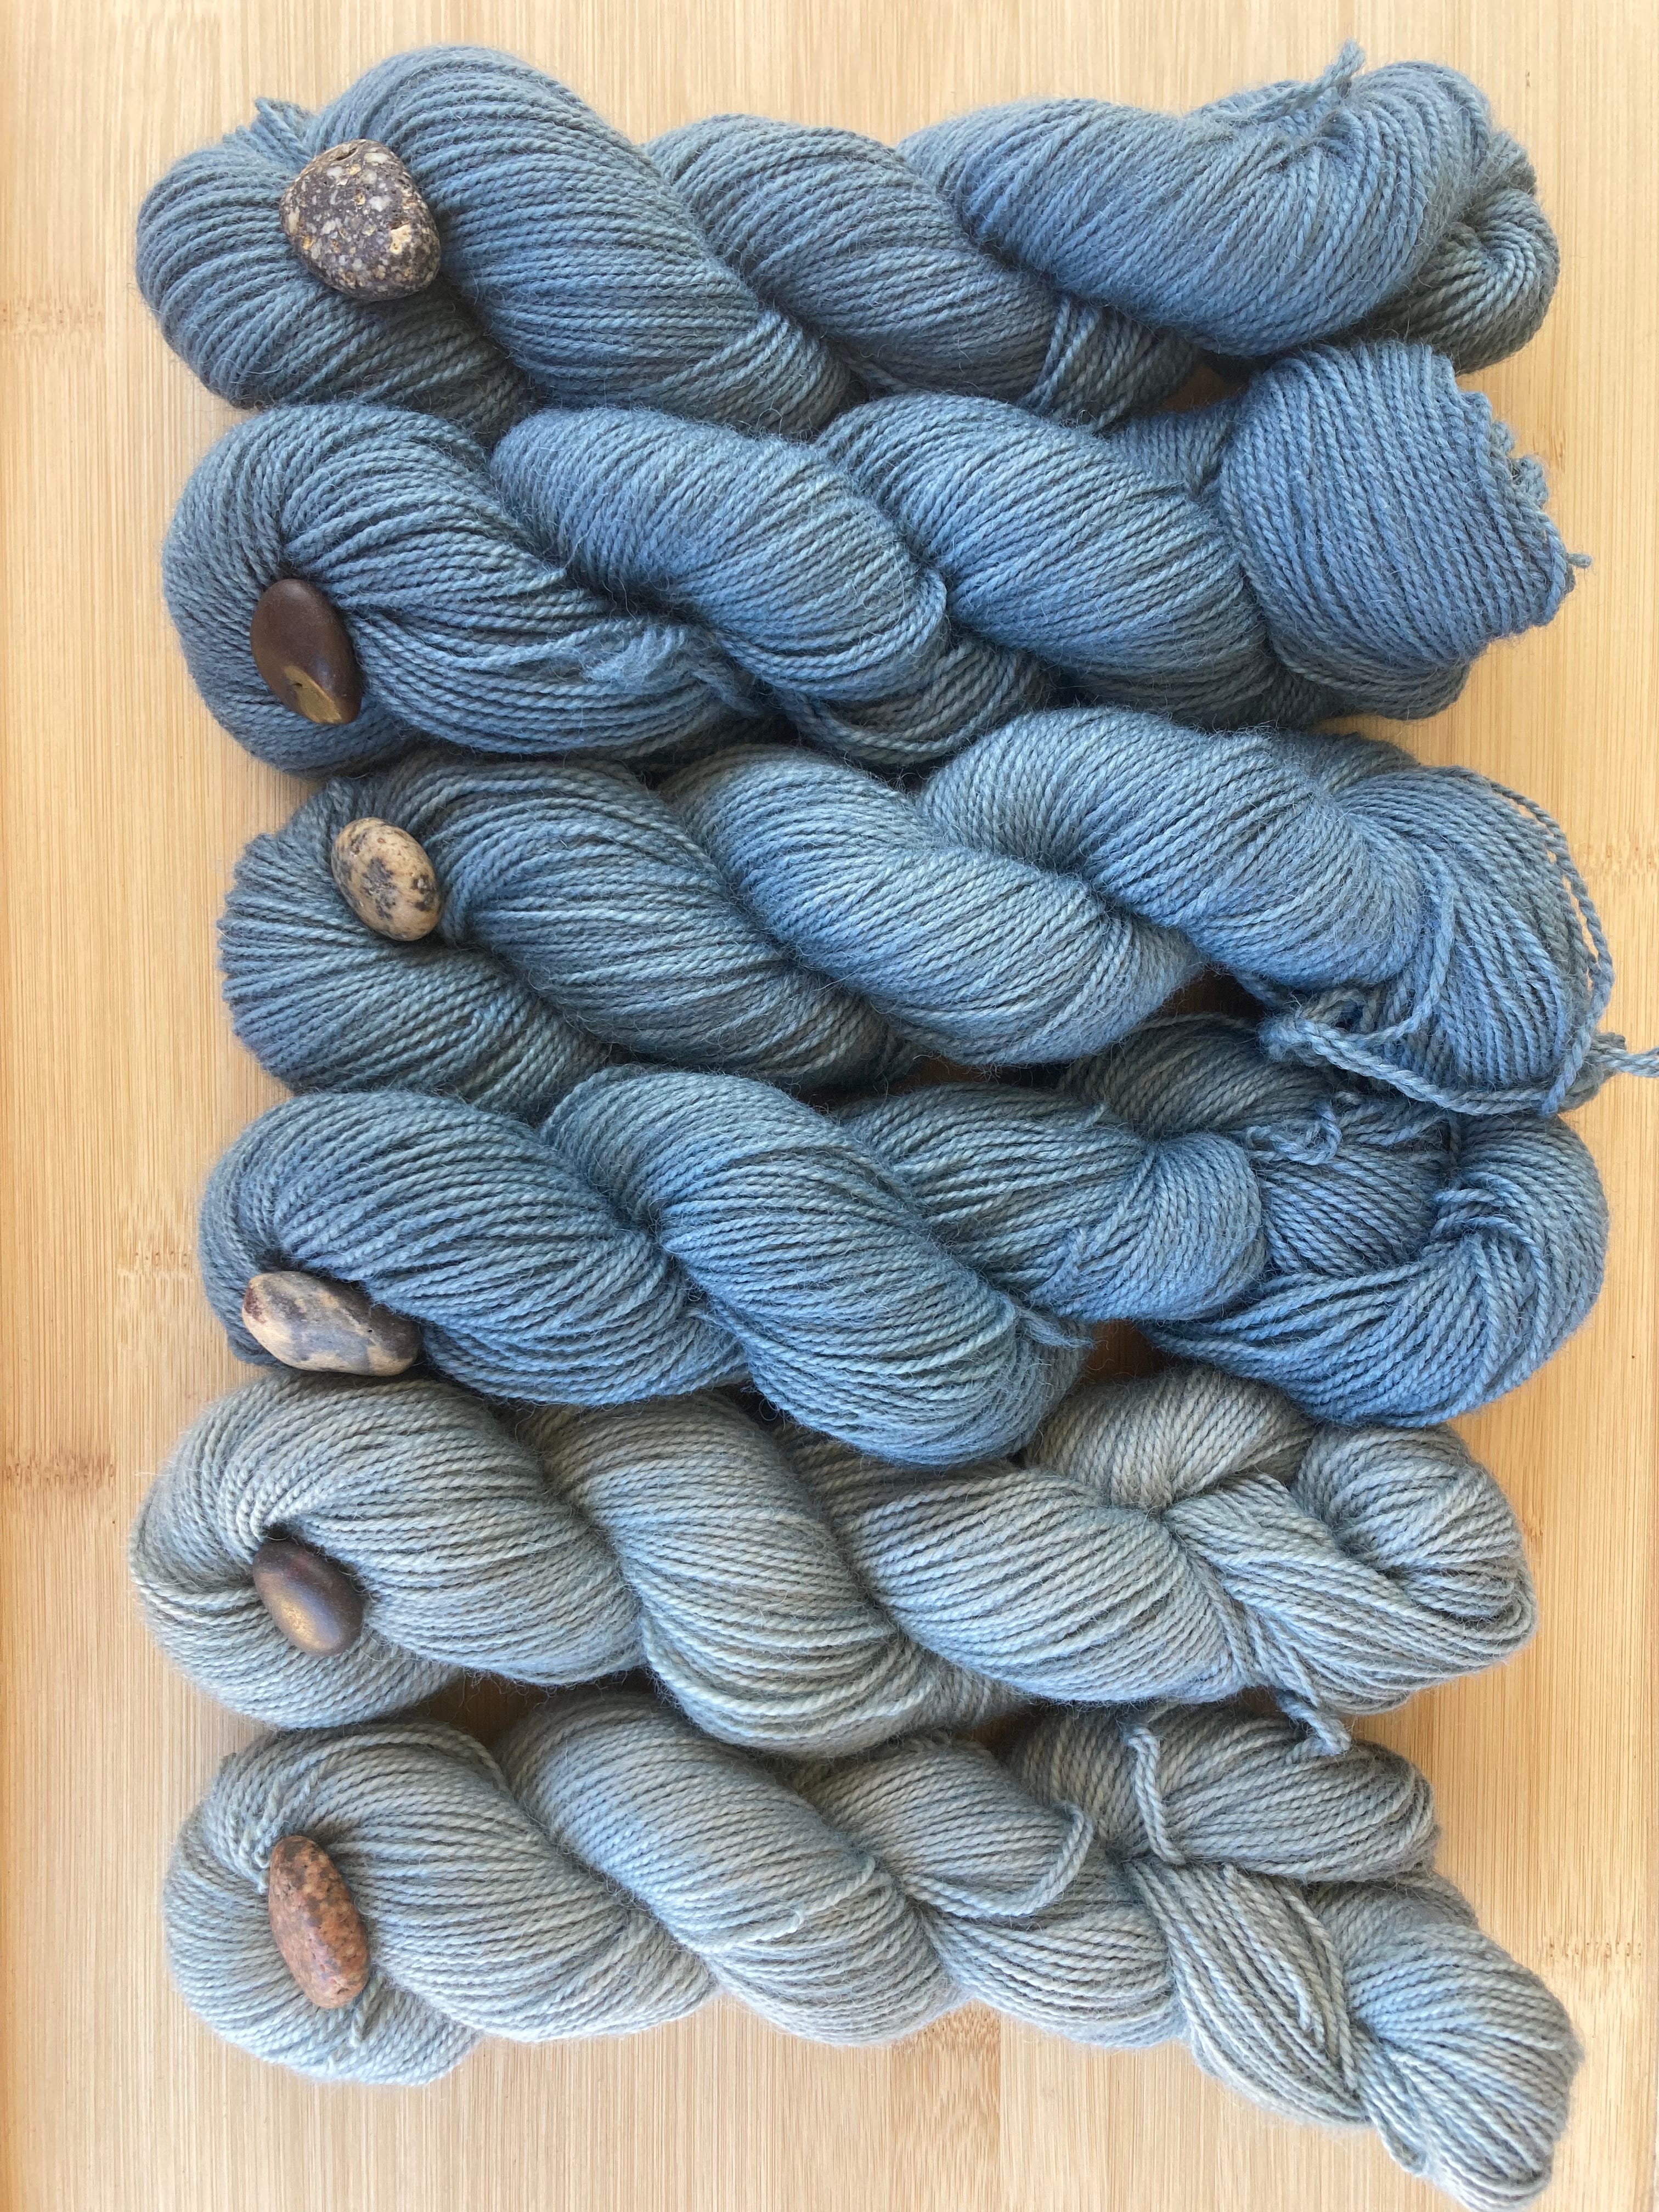
My results were… okay. While the indigo appeared to be a strong greenish color as it emerged from the vat, once oxidized, I had a medium grayish blue. Not a terrible color, but not the intense blue I expected given the good quality and high quantity of my indigo. I added more reduction material, stirred again to balance the vat, and tried again, hoping multiple dips would build more color. This worked somewhat- the color got a bit darker, but was still a muted, grayish tone. At this point I ran out of time to continue troubleshooting- daylight savings time ended last weekend, so the early sunset stopped my dye session. Over the next few days I continued heating, adding alkali and reduction material and trying to rebalance the vat, and managed to get a little bit more indigo pigment and make some pale, muted gray blues, but never succeeded in bringing out the potential I know existed within the vat. At this point I’ve used up some of the indigo on my lackluster blues, plus the days are getting shorter and cooler quickly and my chances of success are rapidly decreasing. I can’t help but feel that this vat was an expensive and time consuming failure.
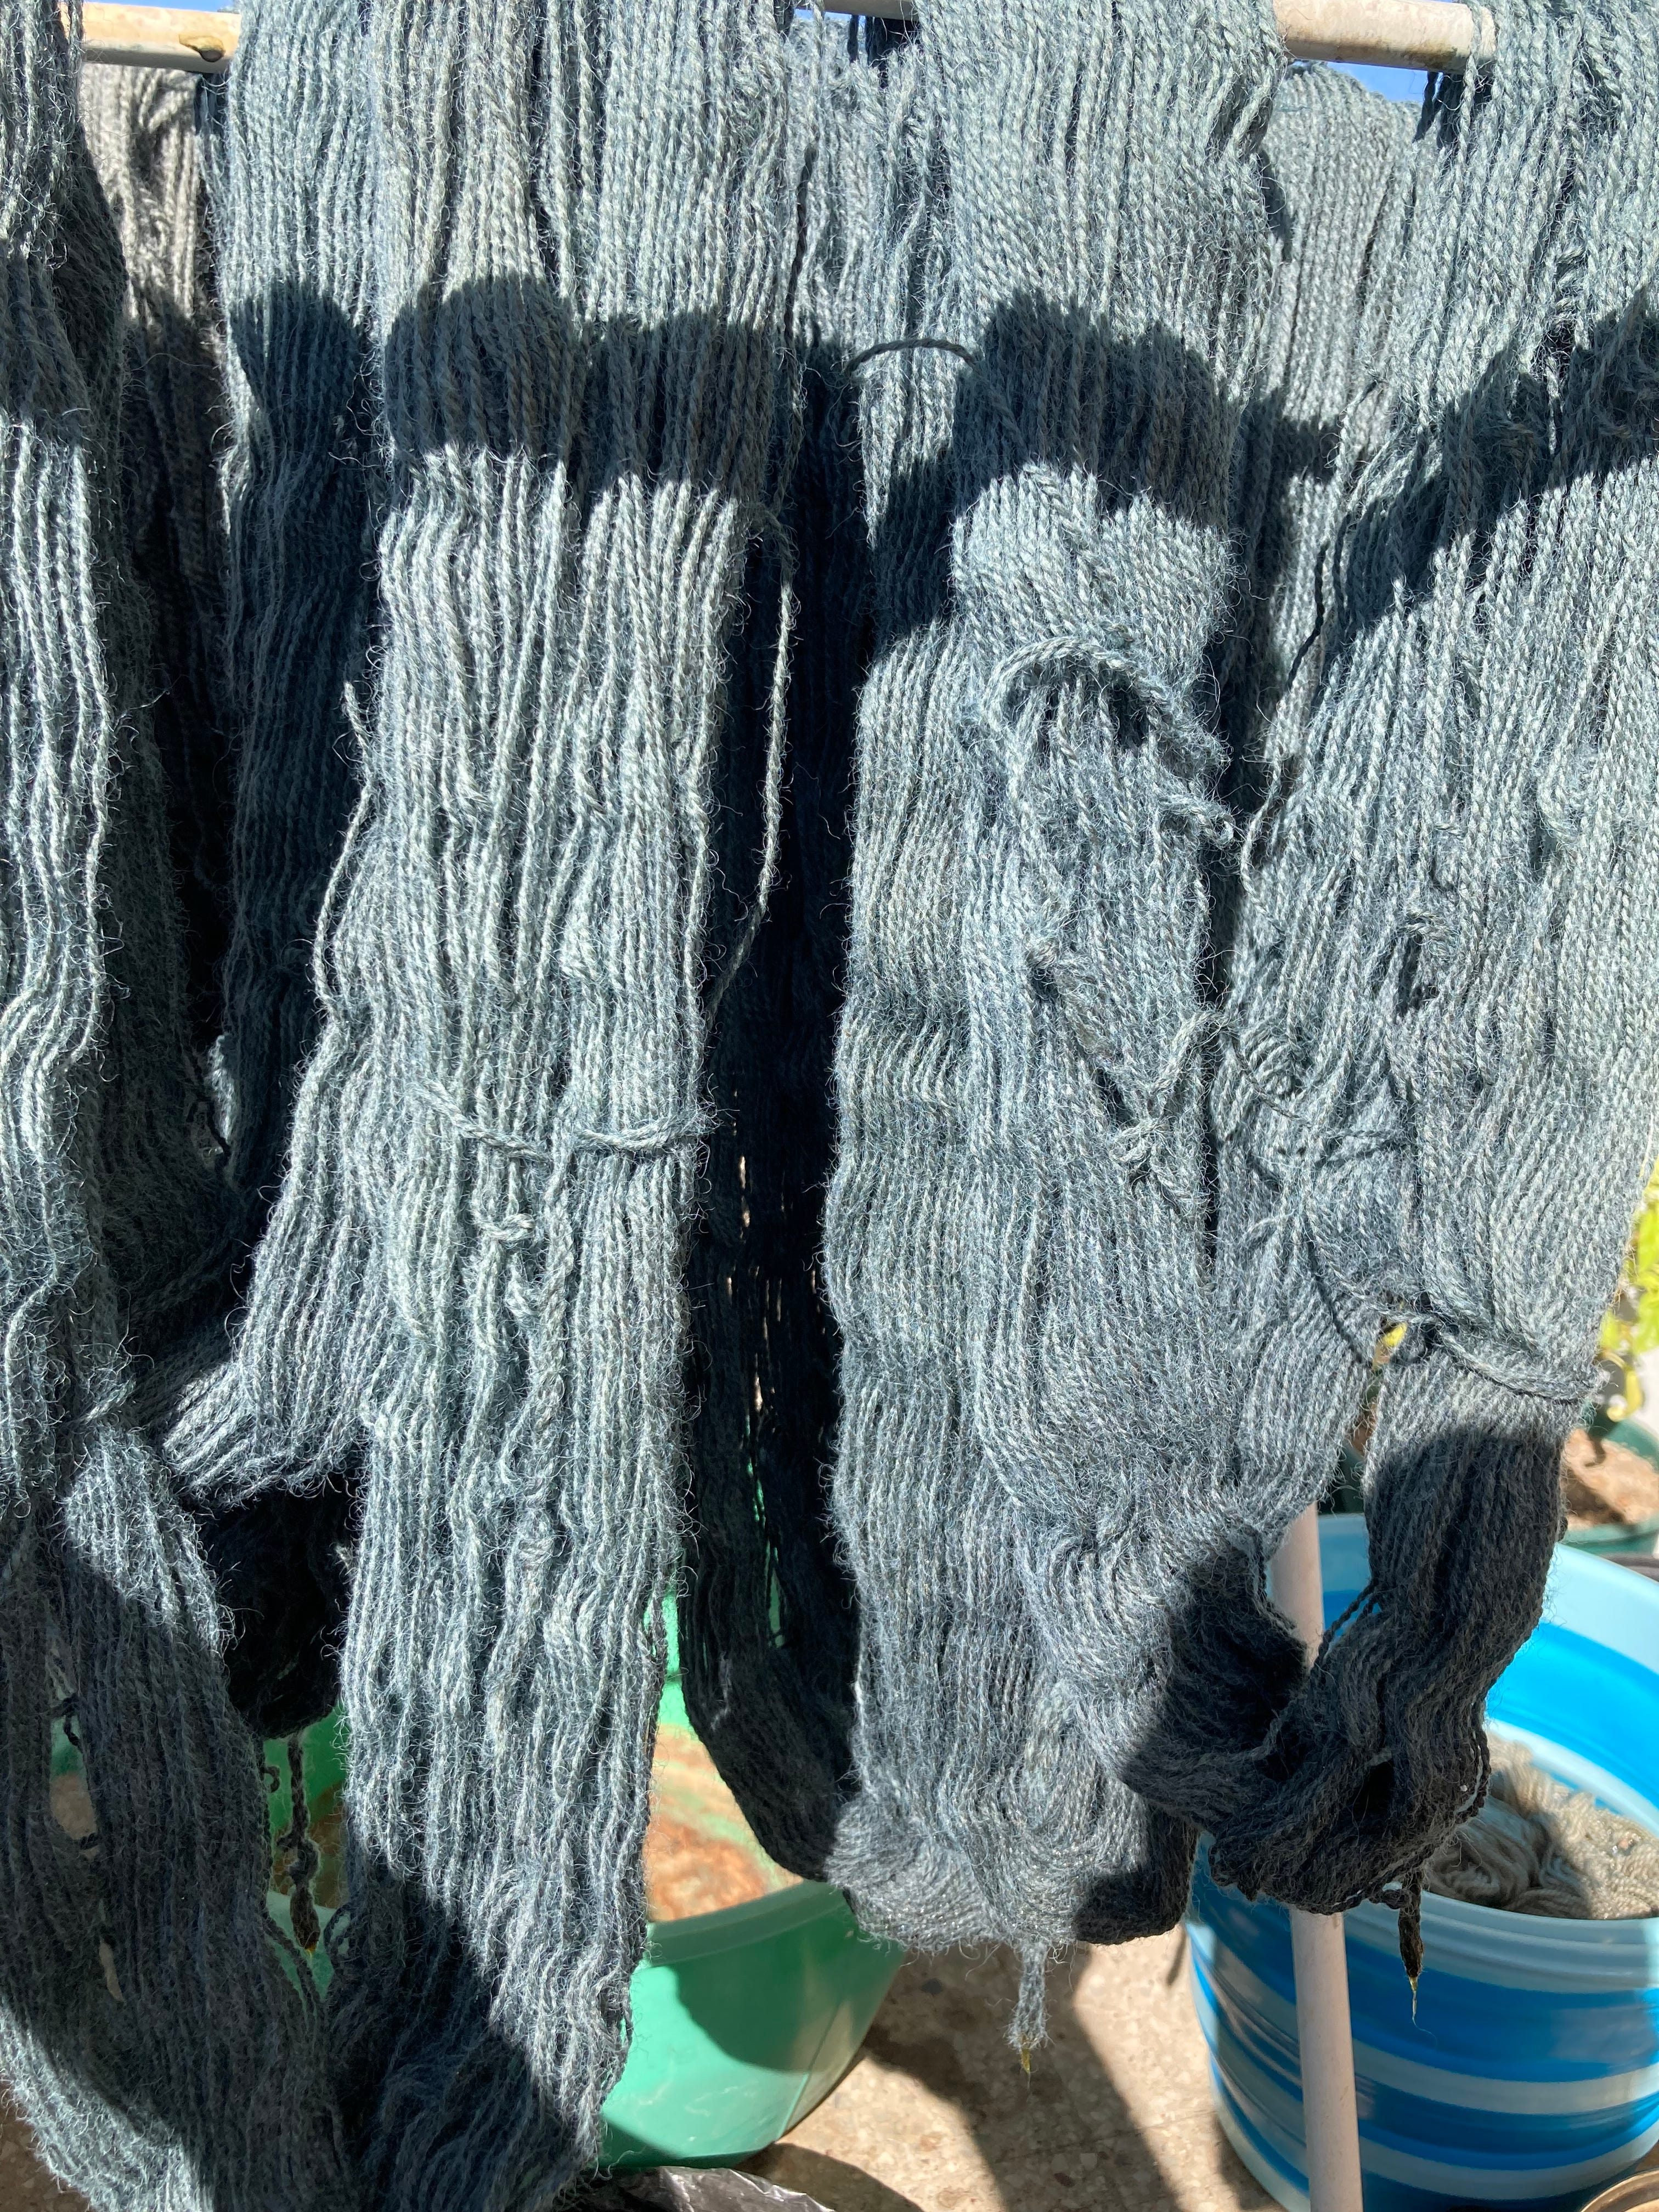
I’m disappointed, but for all my reading on the topic, natural dyeing is learned by doing. I took extensive notes and pictures to try to gain greater understanding of the reduction process. One lesson may be that I need to save indigo dyeing for the hottest days of summer. Or maybe I should have let the indigo cure for even longer, given the cooler temperature. I could also try to achieve success with different reduction materials, and I can’t help but wonder if water quality has something to do with it (I genuinely have no idea, although in my research I haven’t seen any warnings about making an indigo vat with hard water). I haven’t disposed of this vat yet and am still trying to coax color from it, and I did manage to dye 10 skeins of yarn in colors that are unmistakably blue, so it’s not a total loss. The colors are pretty, even, and I do love more muted, complex colors. I can appreciate these results even if they’re not what I hoped for.
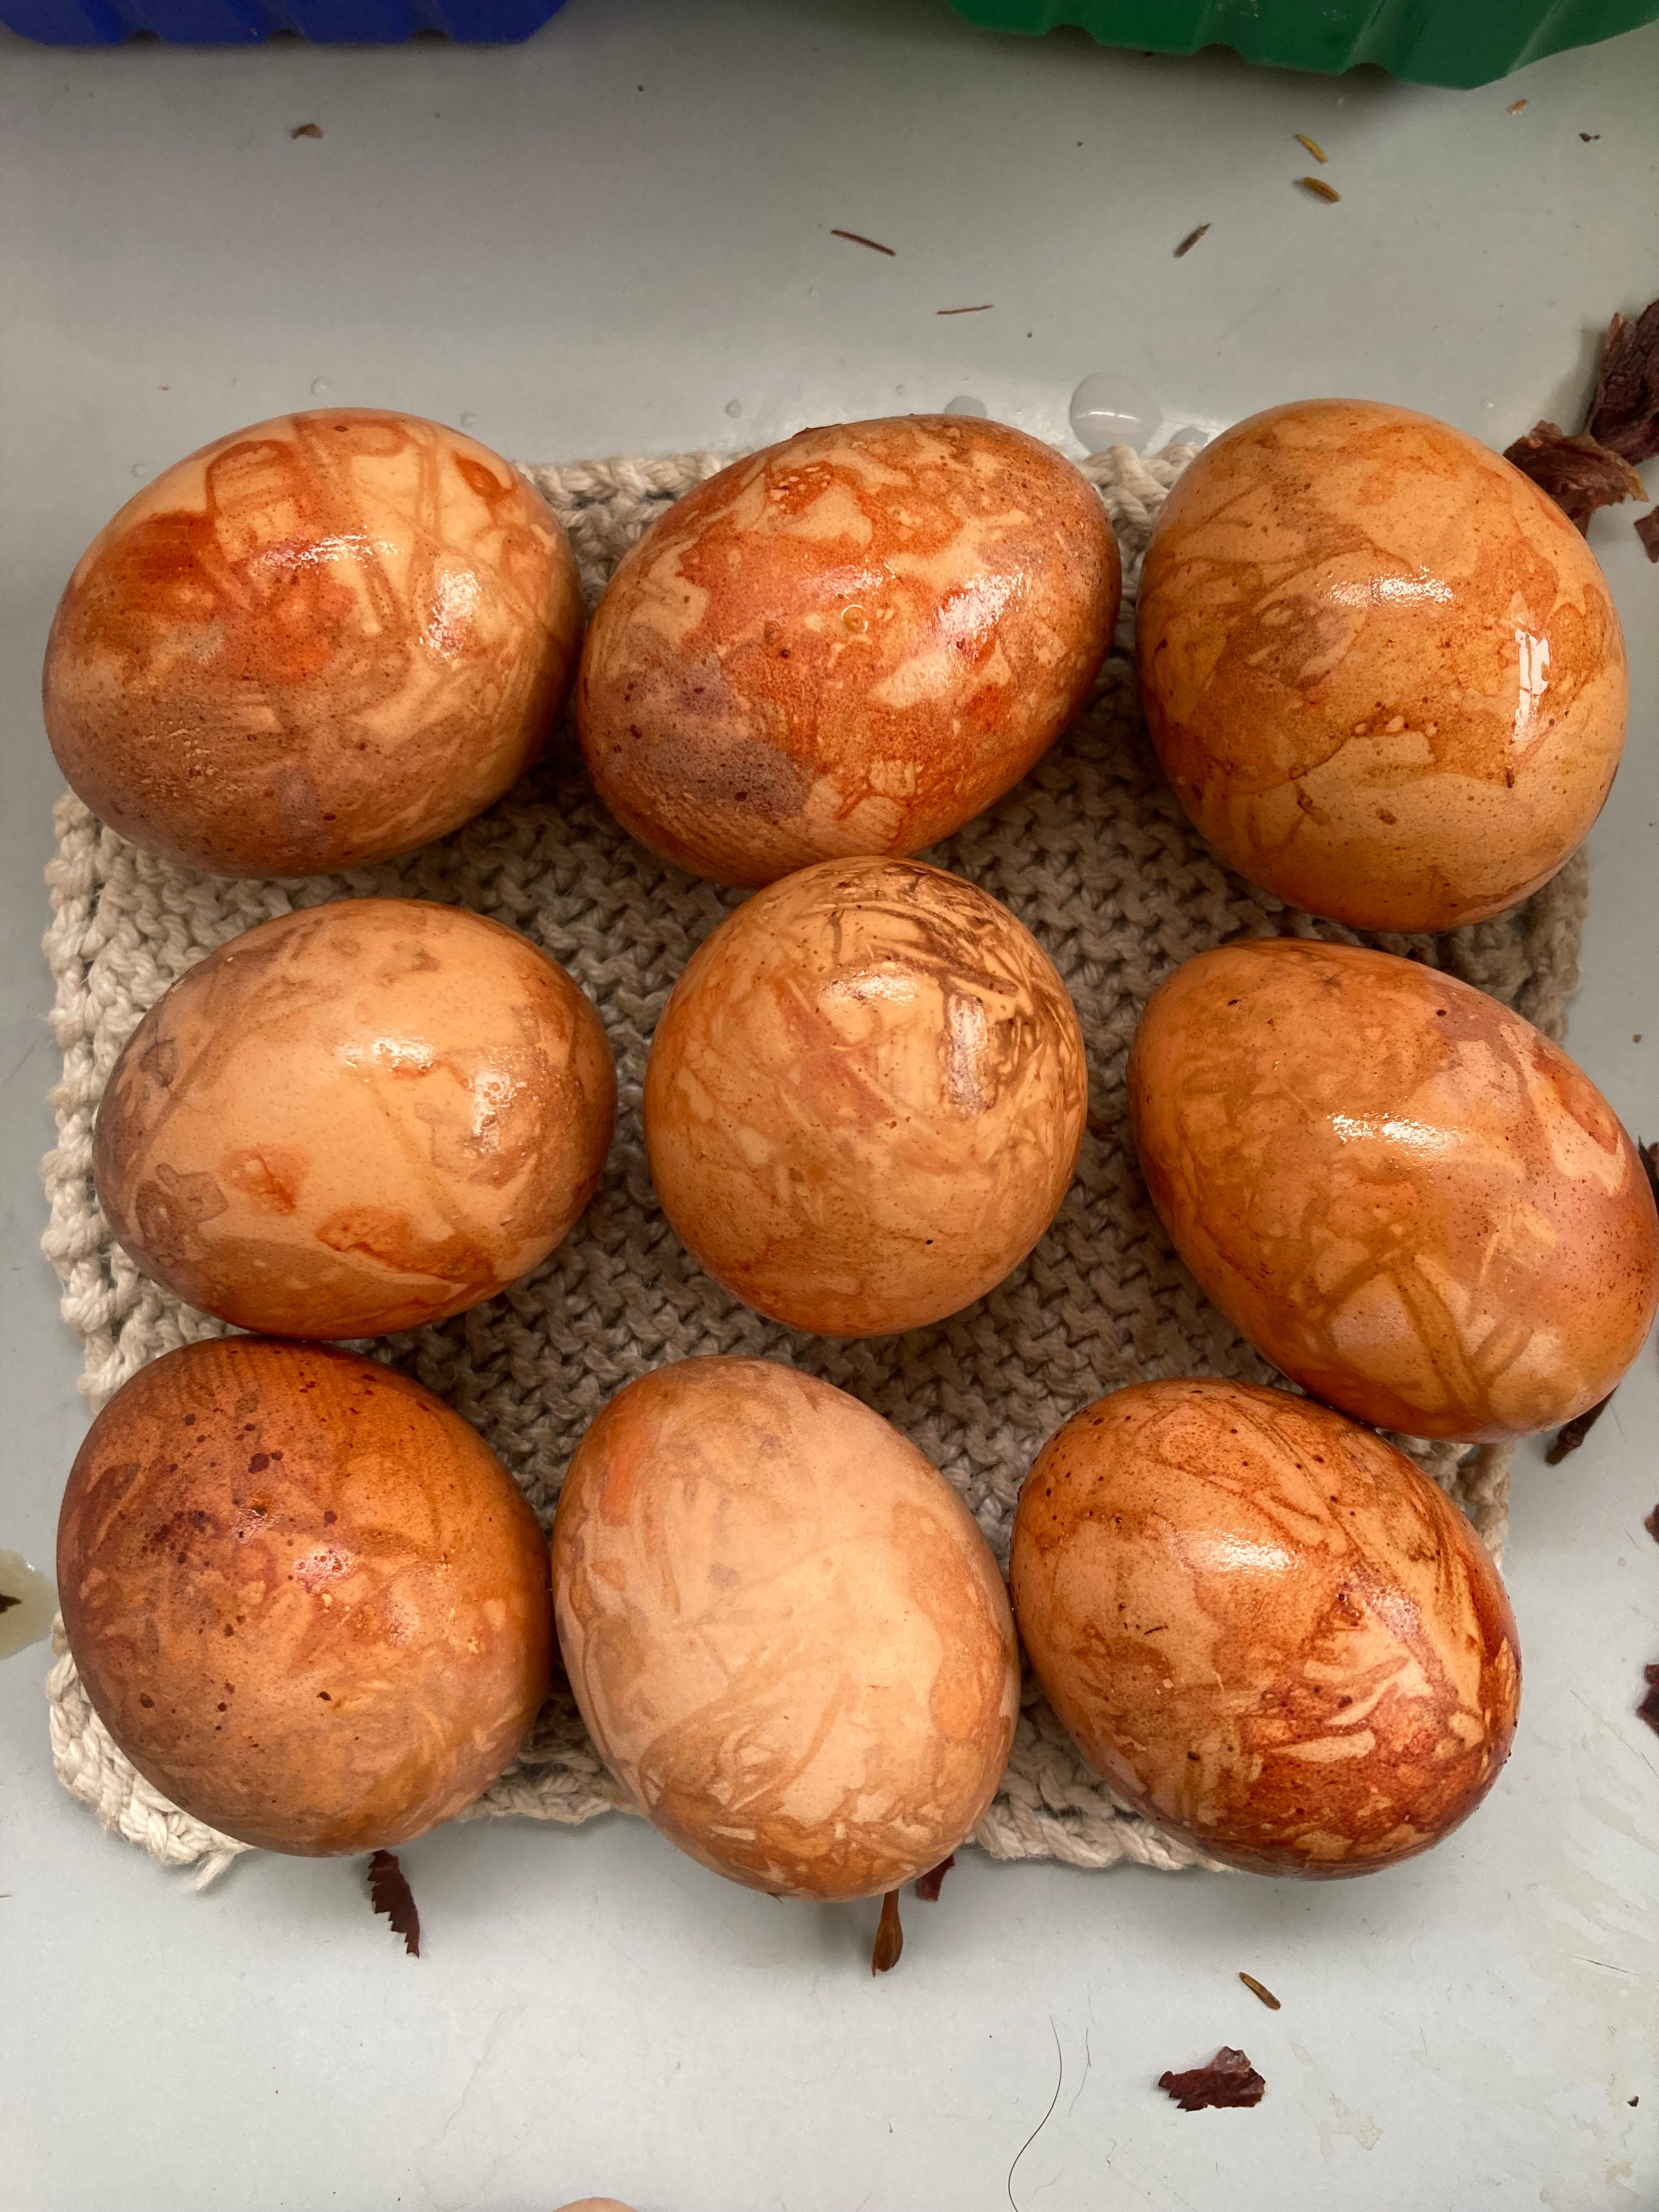
More successful was my Easter egg dyeing this year. I bundle dyed my eggs with a few plants that are staples for me at this time of year: onion skins, quintral, sweetgum leaves, hibiscus flowers. I made a reel showing the process. I was worried that all that steaming would result in terribly overcooked eggs, but I ate one for breakfast and can report that they are a little more cooked than I normally prefer, but not bad at all. Next year I might soft boil them before dyeing so that they come out perfectly as both Easter decoration and Easter snack.
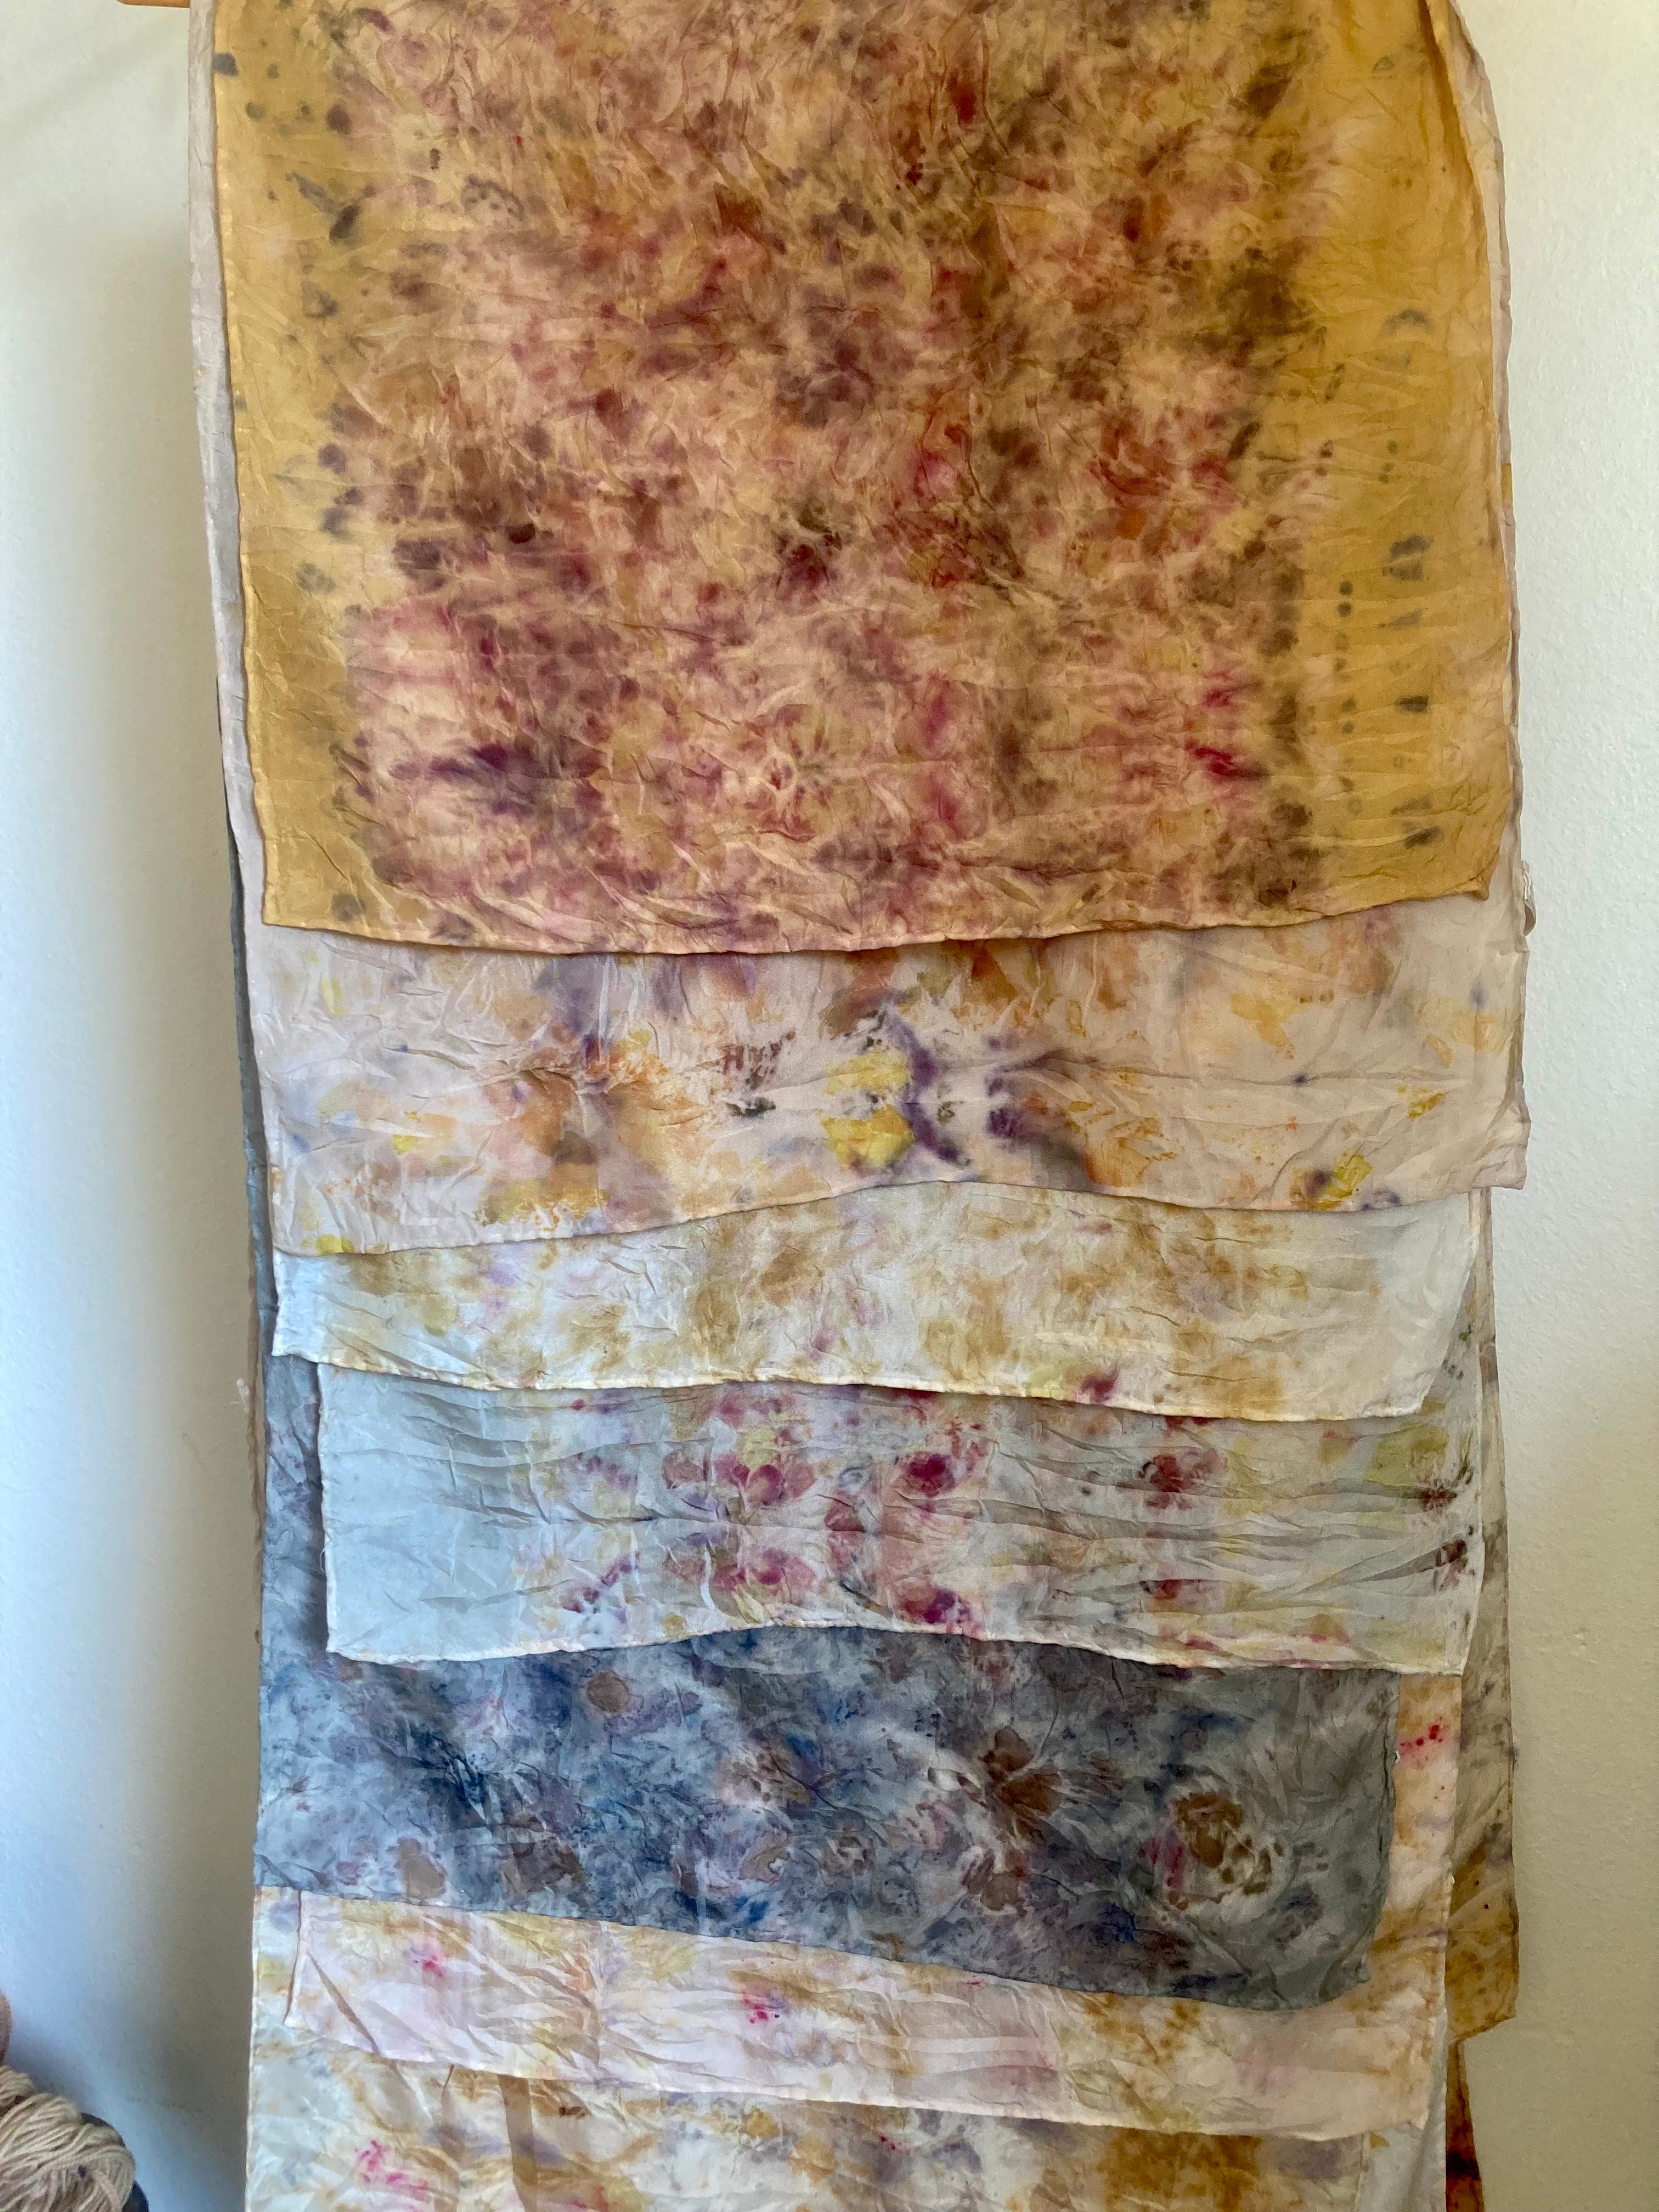
I reused the same materials to bundle dye a set of silk scarves that I made in 2017. I actually have a lot of rinsing to do so this was maybe procrastinating, but I do think the results are nice. Thinking about bringing these to Expo Teje and then listing them in my shop.
News
Expo Teje is coming up soon! I’m so excited to participate and spend time with the knitting community in Chile.
I’m also still planning for my workshops! I’m hoping to add a couple in Chile in May or June, and I’m still getting ready for July in Ohio! If you’re interested in a workshop in person or online, let me know in the comments or reply to this email.
You can follow me on Instagram, Pinterest and the Making app to see more natural dyeing and other making. My yarn is always available at neblinawool.com.
Finally, if you enjoy this newsletter, please subscribe to receive it in your inbox or share it with someone else who would like it!
repeated with similar results, although repeated colors will never turn out exactly the same
Thank you for the tips Sara! I hope we will have the opportunity to try it in the next month!
Fascinating I can’t wait to try an indigo Vat. We have all of the materials but have just been afraid to take the plunge🙈